Work
Manage tasks, projects, timesheets, and tracker-captured work logs involving you.
Use Work for your personal view of work-management data. The actions and records available to you depend on your project membership and permissions.
Work views
The Work workspace contains four views:
- Task — review, create, and update work items.
- Projects — open the projects to which you have access.
- Timesheet — review recorded work periods and their approval or billing state.
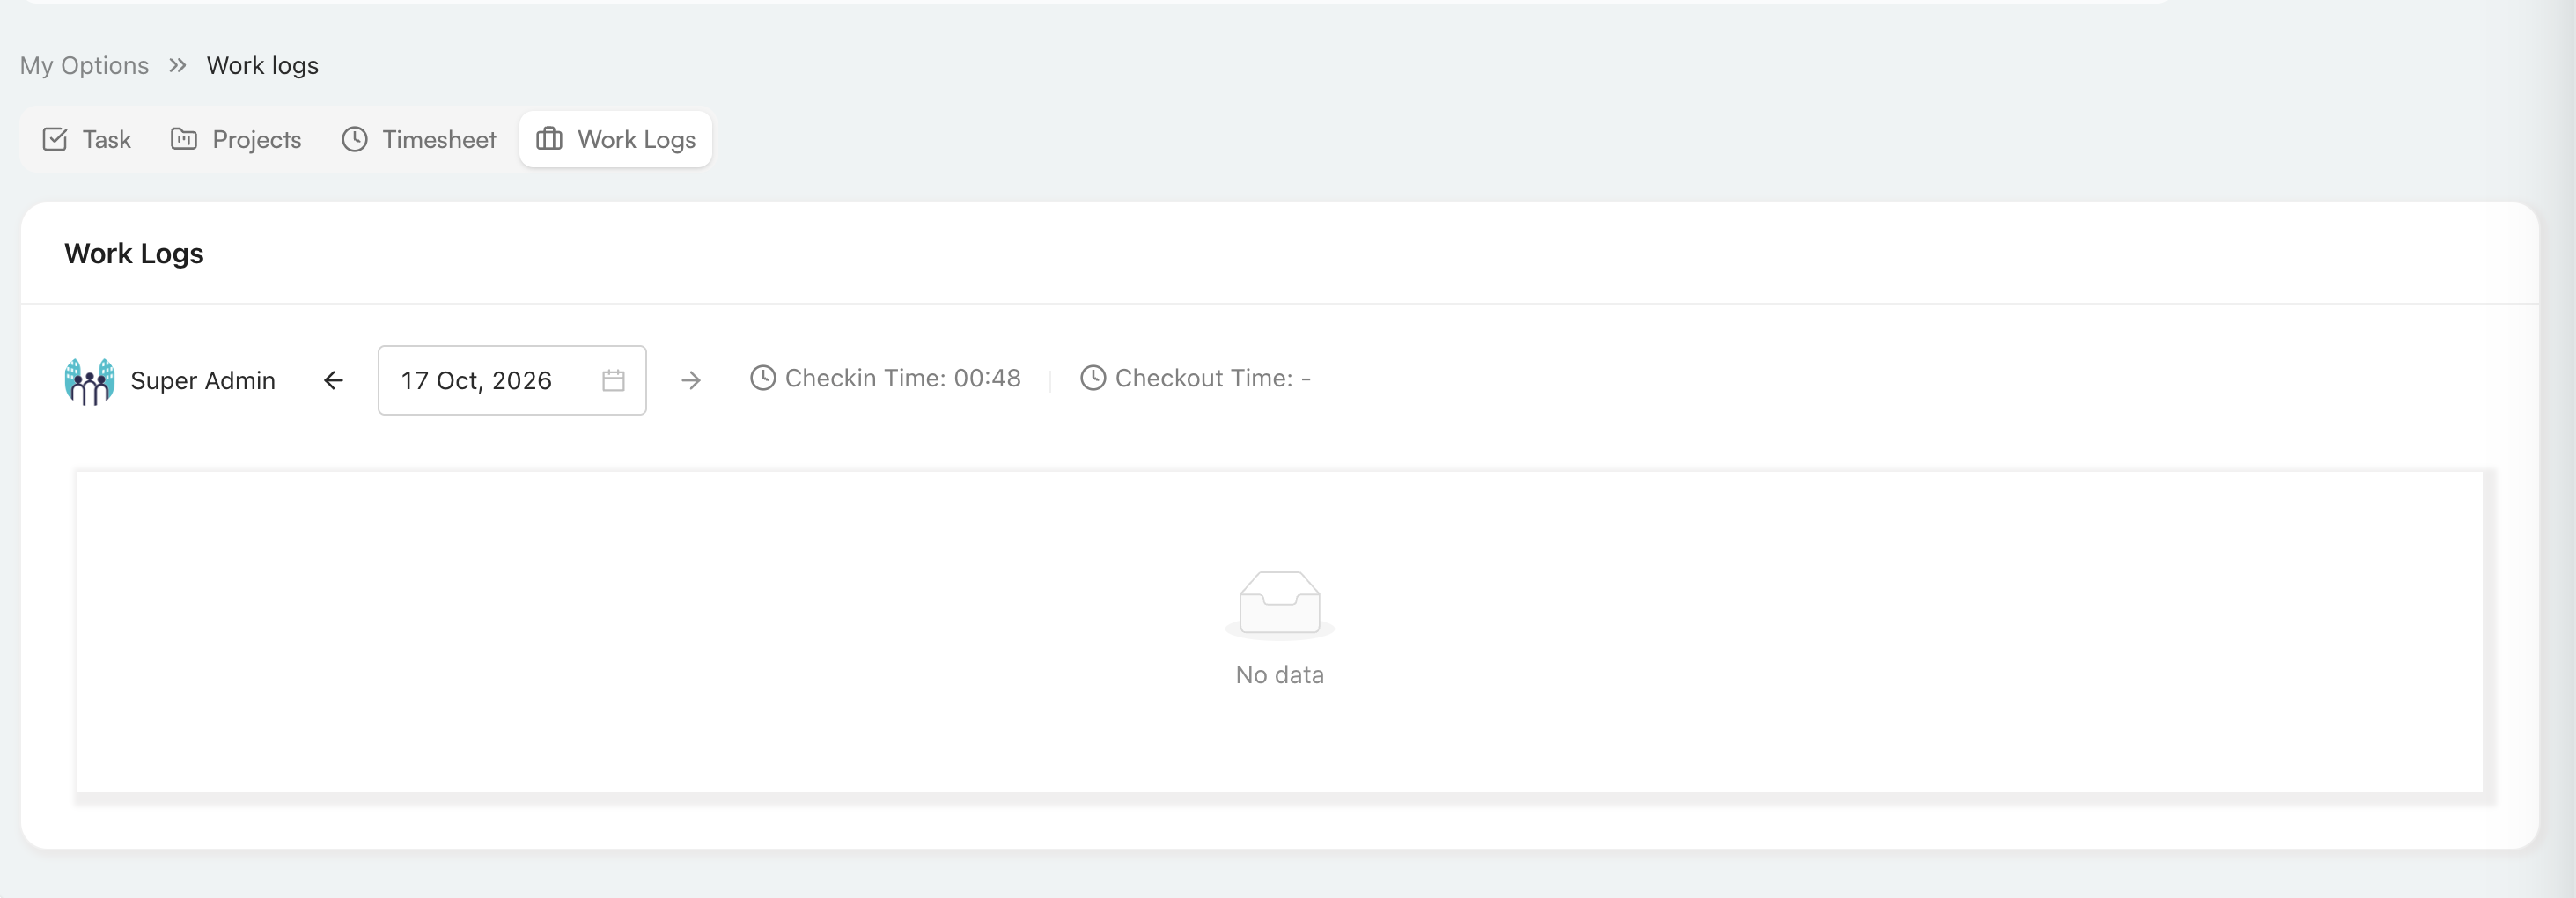
- Work Logs — review screenshots captured by the desktop tracker, when available.

Task
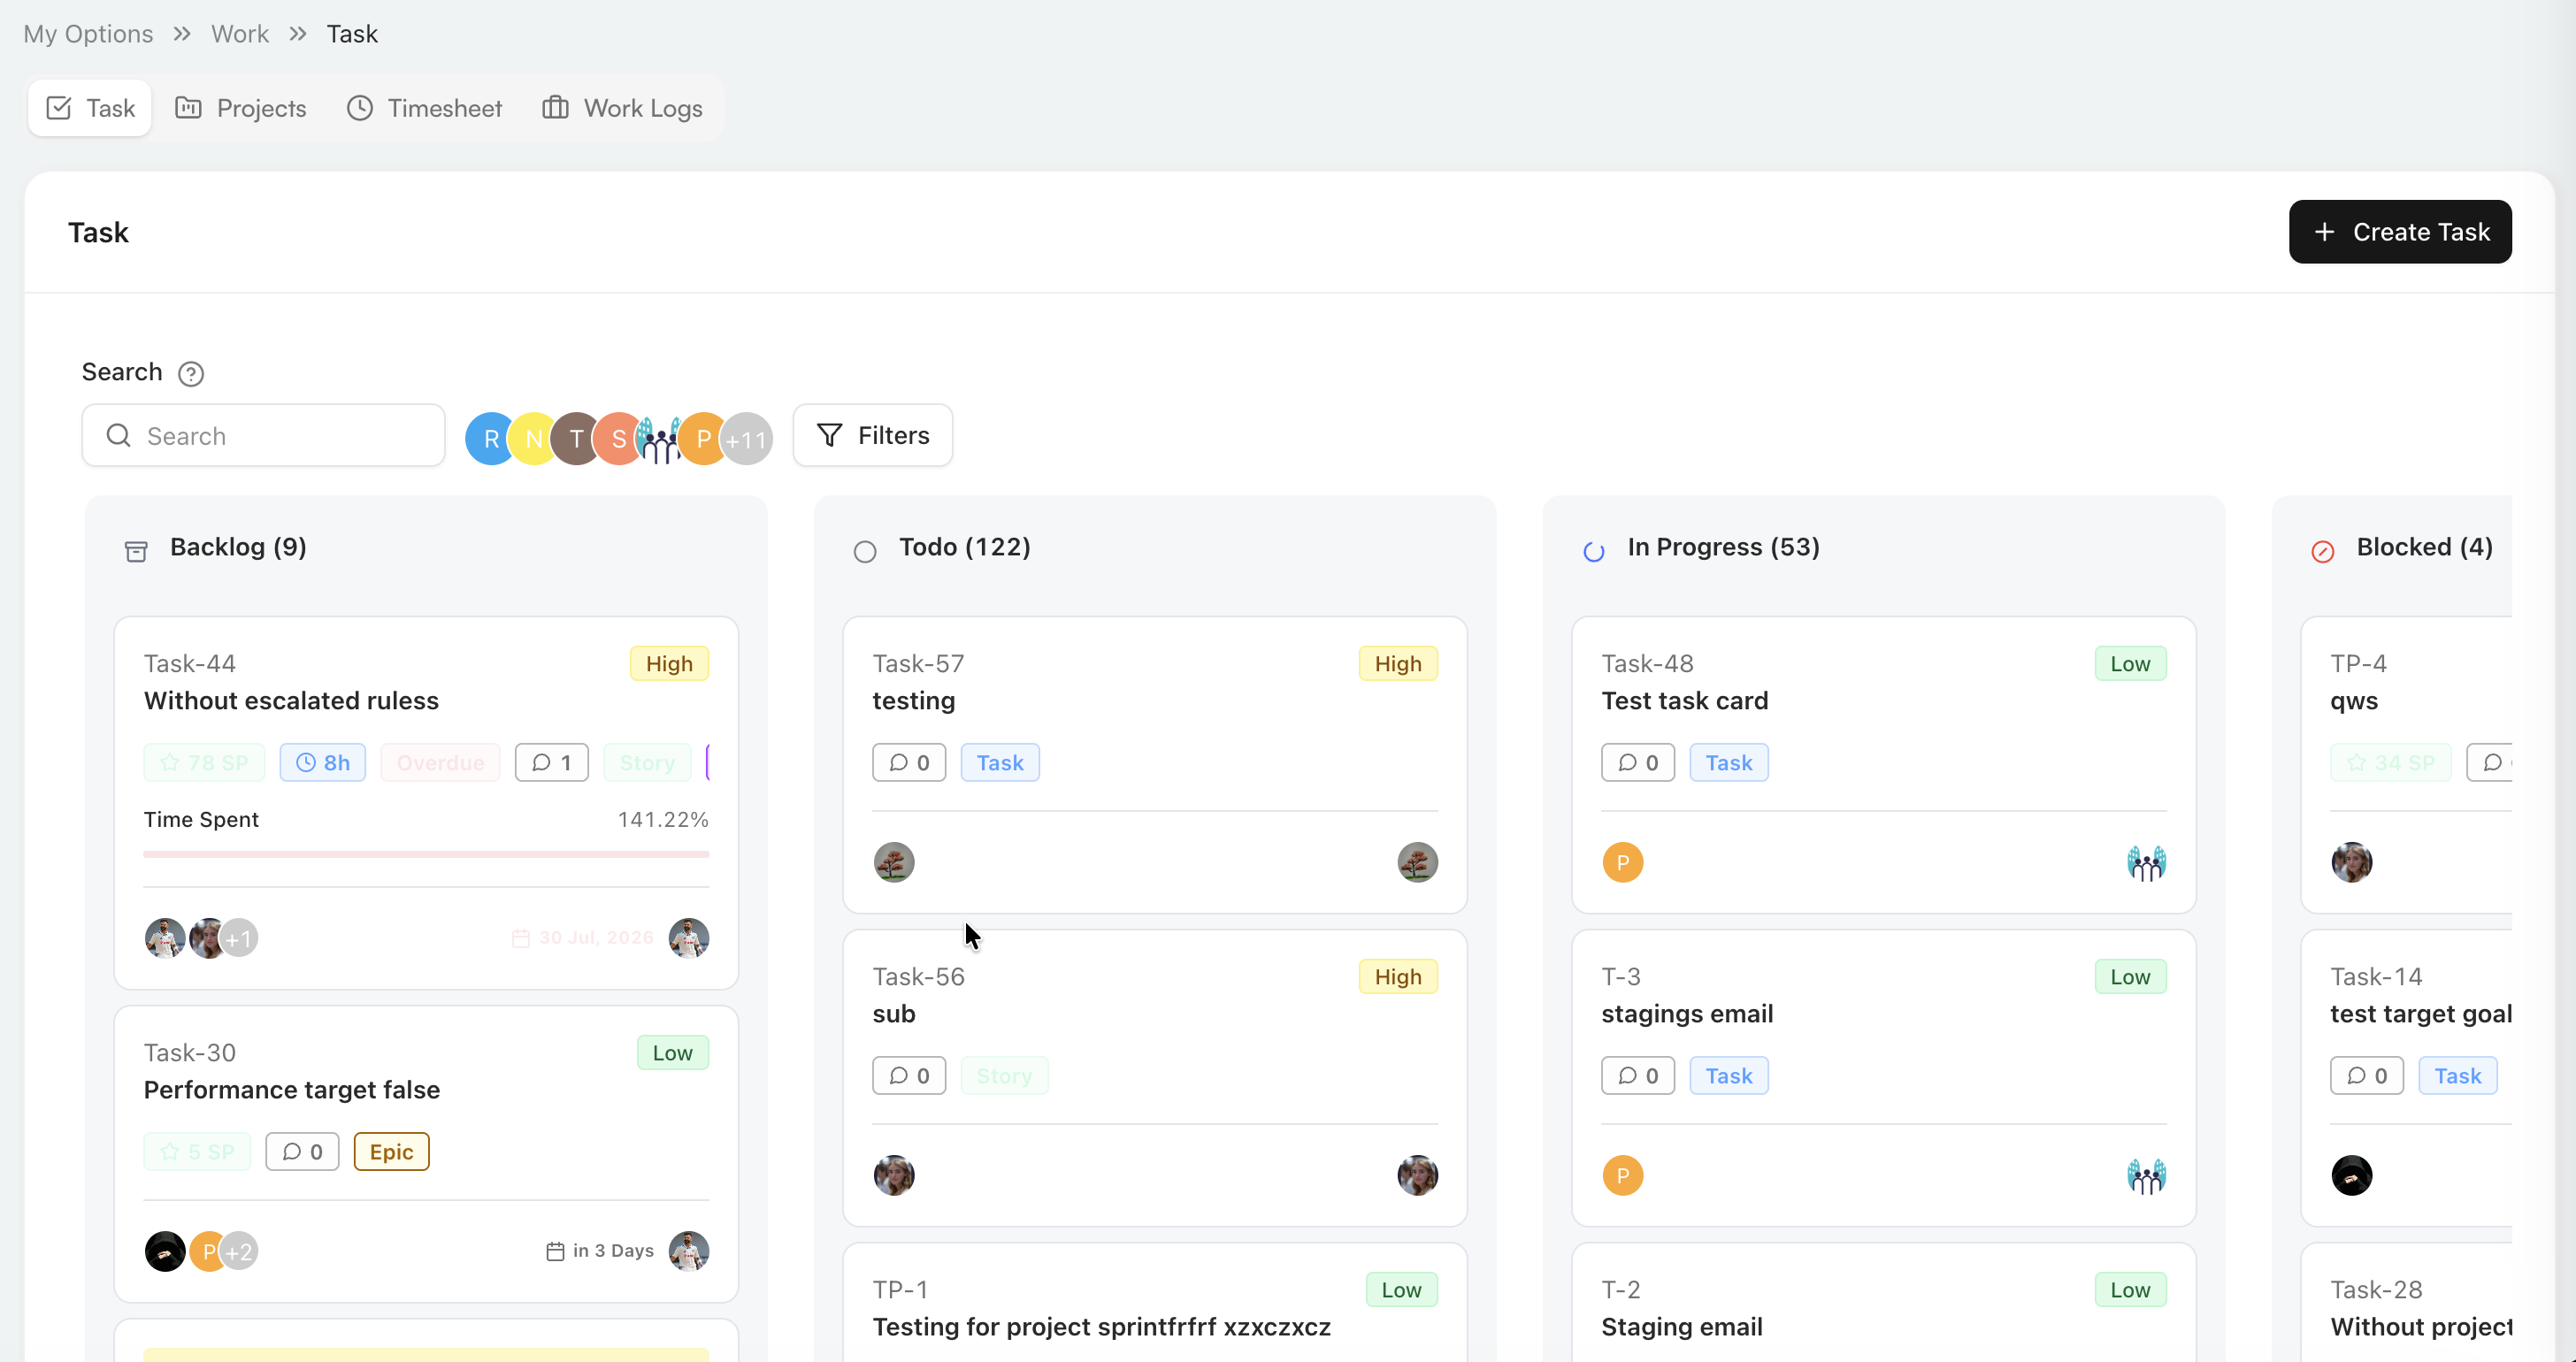
The task board groups work into workflow columns such as Backlog, Todo, In Progress, and Blocked. Each column heading shows its task count. Cards can show the task key and title, priority, issue type, story points, comments, time spent, due date, assignees, and reporter when those values are available.
Use the search box to find a task, select a participant avatar to narrow the board, or open Filters for more options. Select Create Task to add a work item.
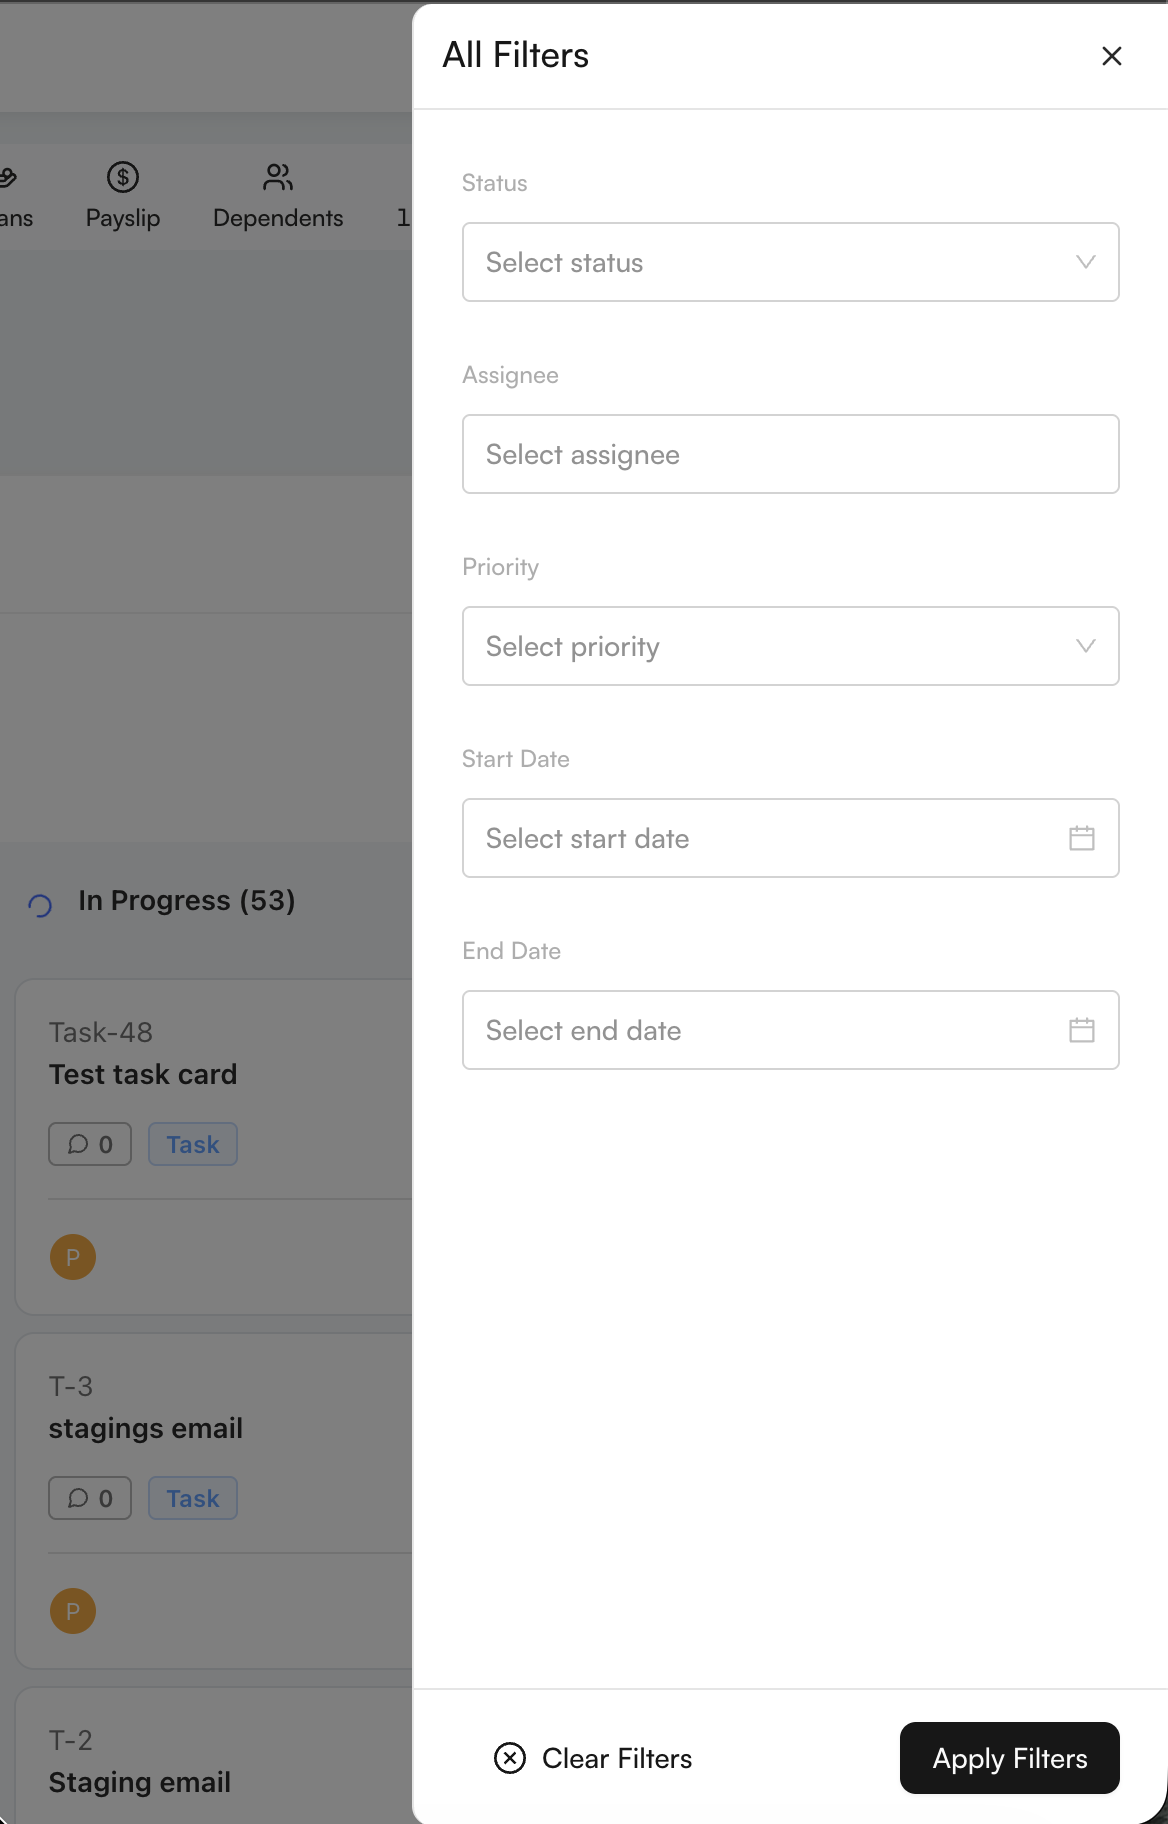
Filter tasks
The filter drawer supports status, assignee, priority, start date, and end date. Select Apply Filters to update the board or Clear Filters to remove all selections.
Create a task
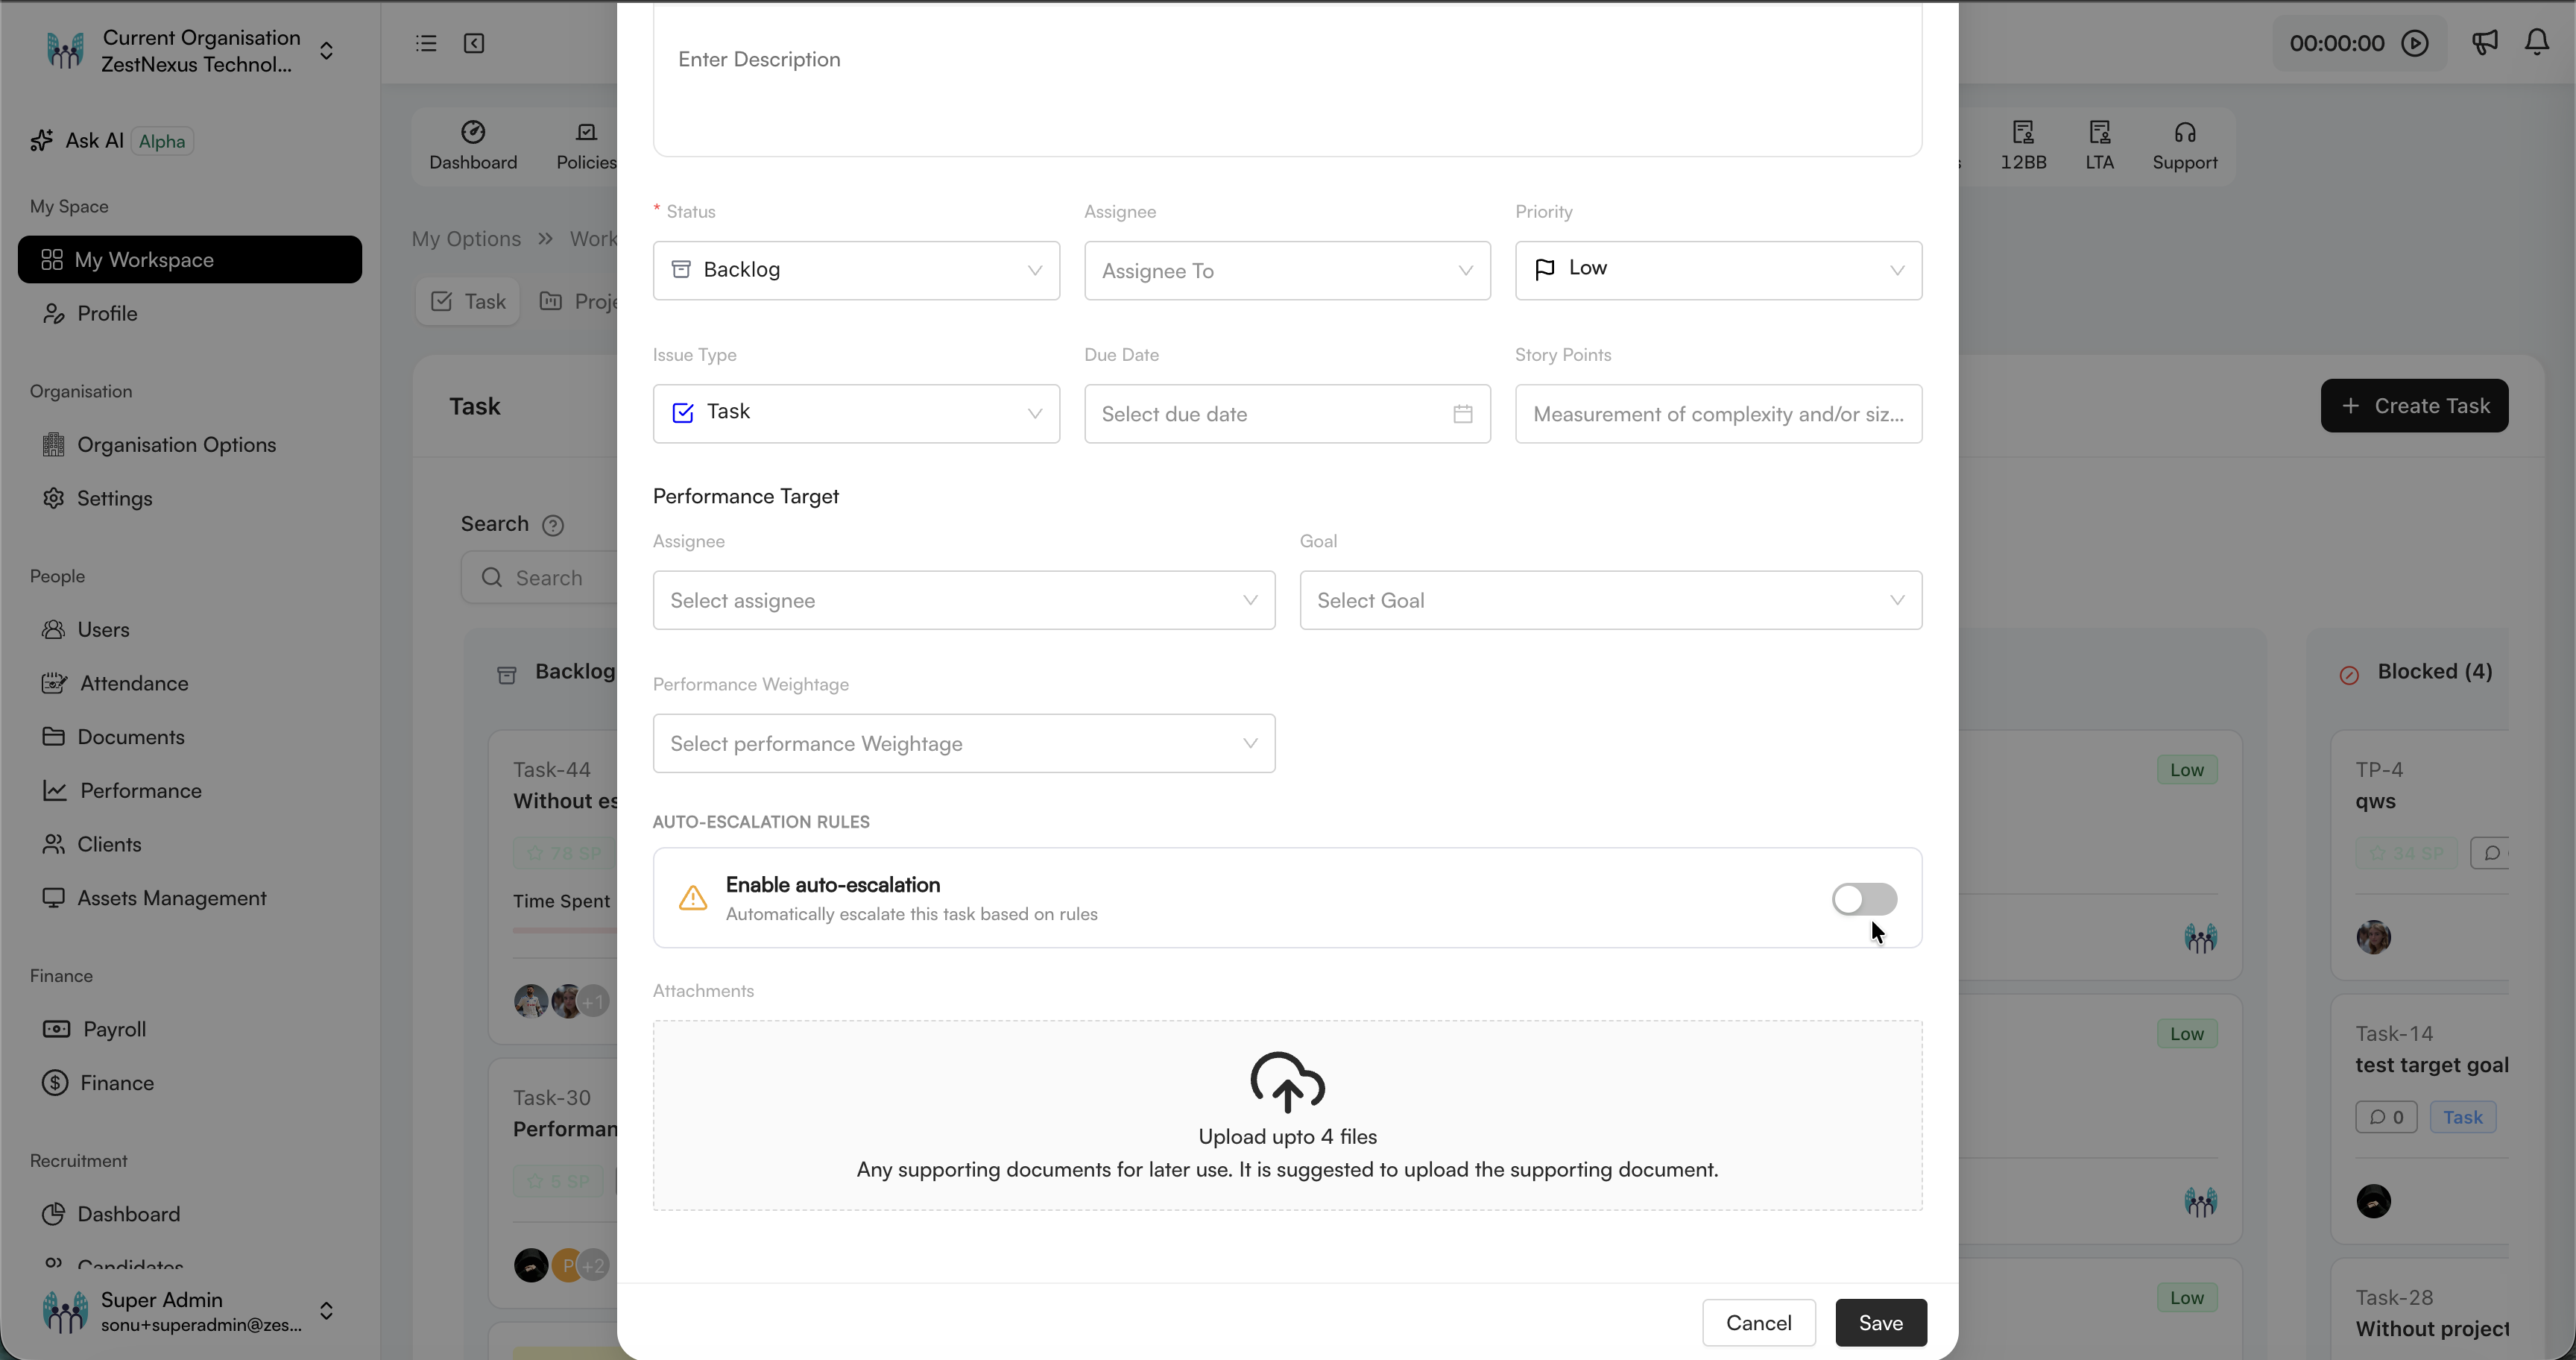
Select Create Task and complete the task form. If available, Generate can help populate the title, description, acceptance criteria, and story points. Review generated content before saving it.
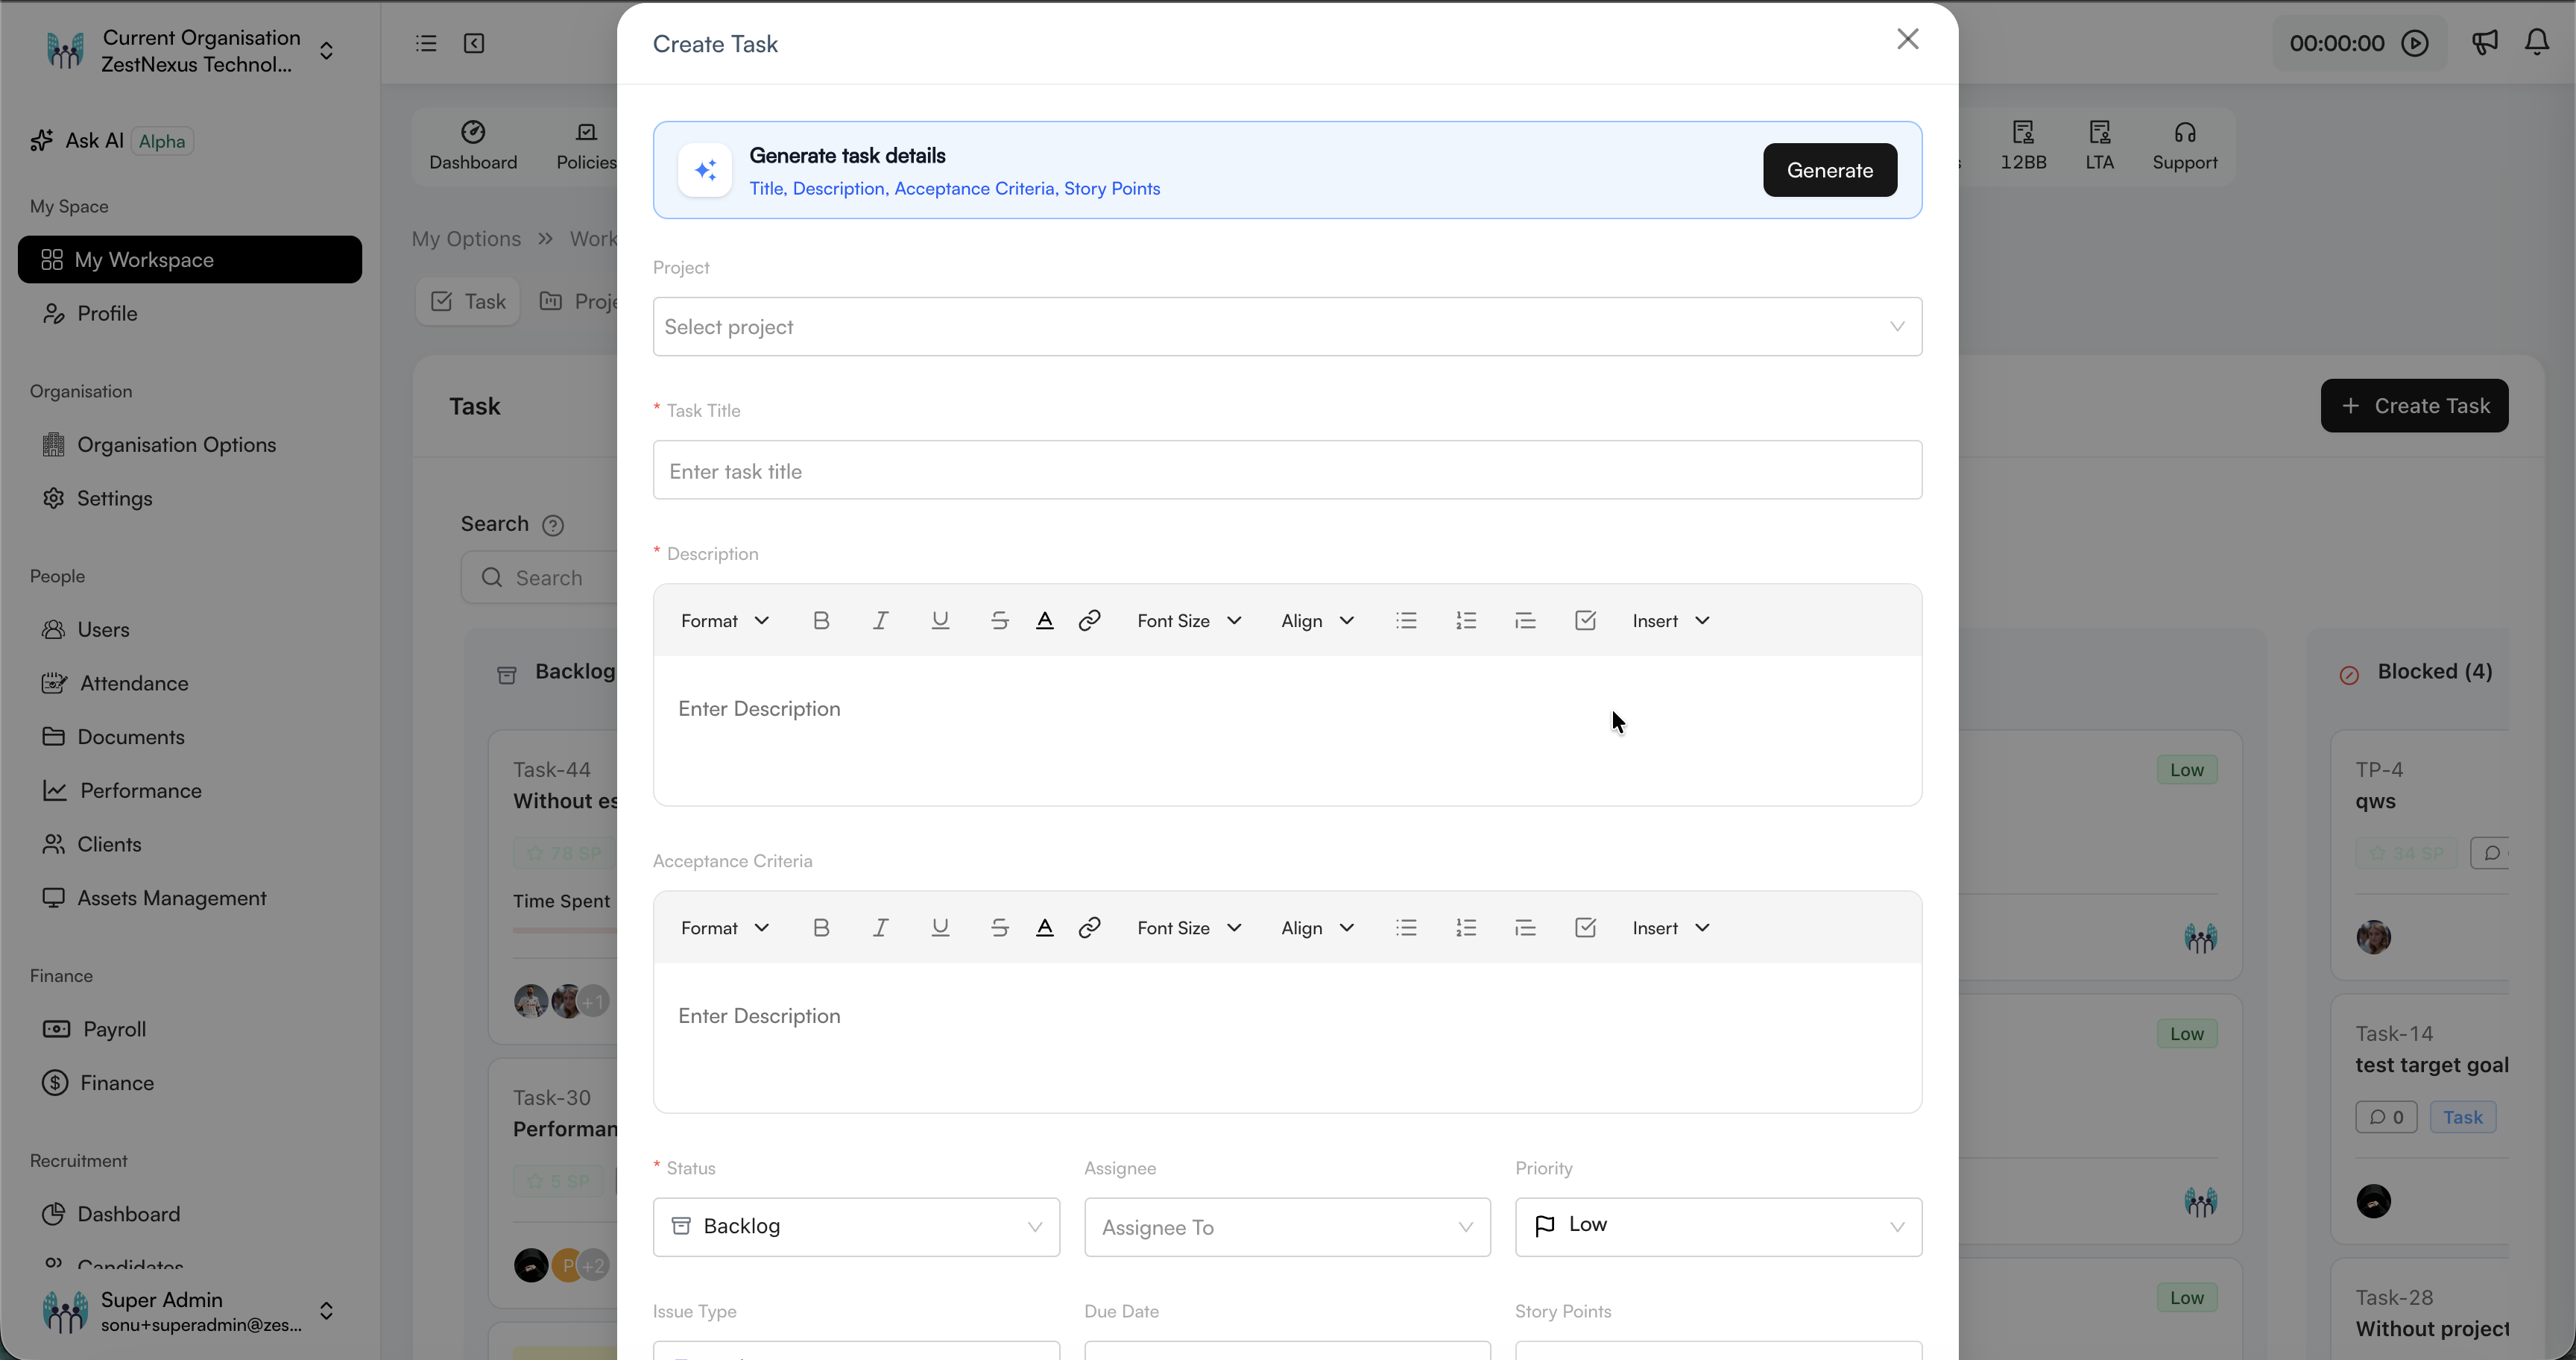
The form contains the following information:
| Field | Description |
|---|---|
| Project | Associate the task with a project when applicable. |
| Task Title | Enter the required task name. |
| Description | Describe the expected work. |
| Acceptance Criteria | Record the conditions that define completion. |
| Status | Select the task's initial workflow stage. |
| Assignee | Choose the person responsible for the task. |
| Priority | Set the relative urgency. |
| Issue Type | Classify the work, such as task or story. |
| Due Date | Set the target completion date. |
| Story Points | Enter the estimated complexity or size. |
| Performance Target | When applicable, connect the task to an assignee, goal, and performance weightage. |
| Attachments | Upload up to four supporting files. |
The lower part of the form also contains the auto-escalation control. Select Save when the task is ready.
Configure auto-escalation
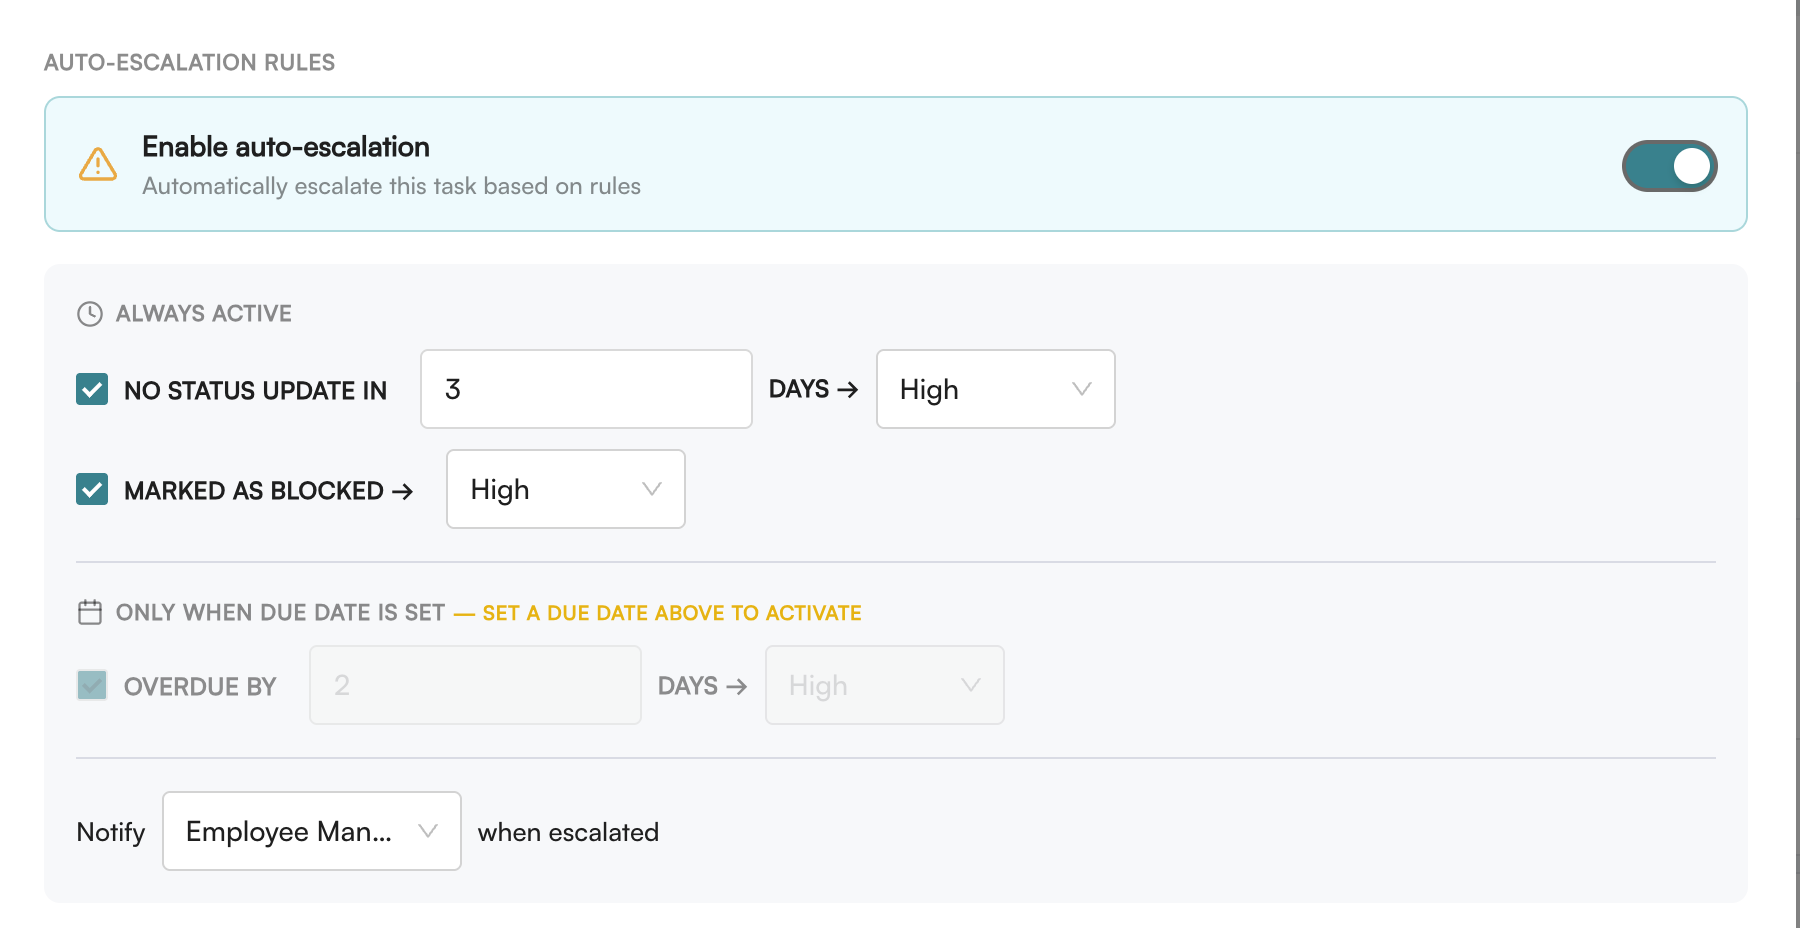
Enable Auto-escalation to automatically escalate the task when selected rules are met. Available rules can include:
- no status update for a specified number of days;
- the task being marked as blocked; and
- the task remaining overdue for a specified number of days when a due date is set.
For each active rule, select the escalation level. Also select who should be notified when an escalation occurs. Due-date rules remain unavailable until the task has a due date.
Task details
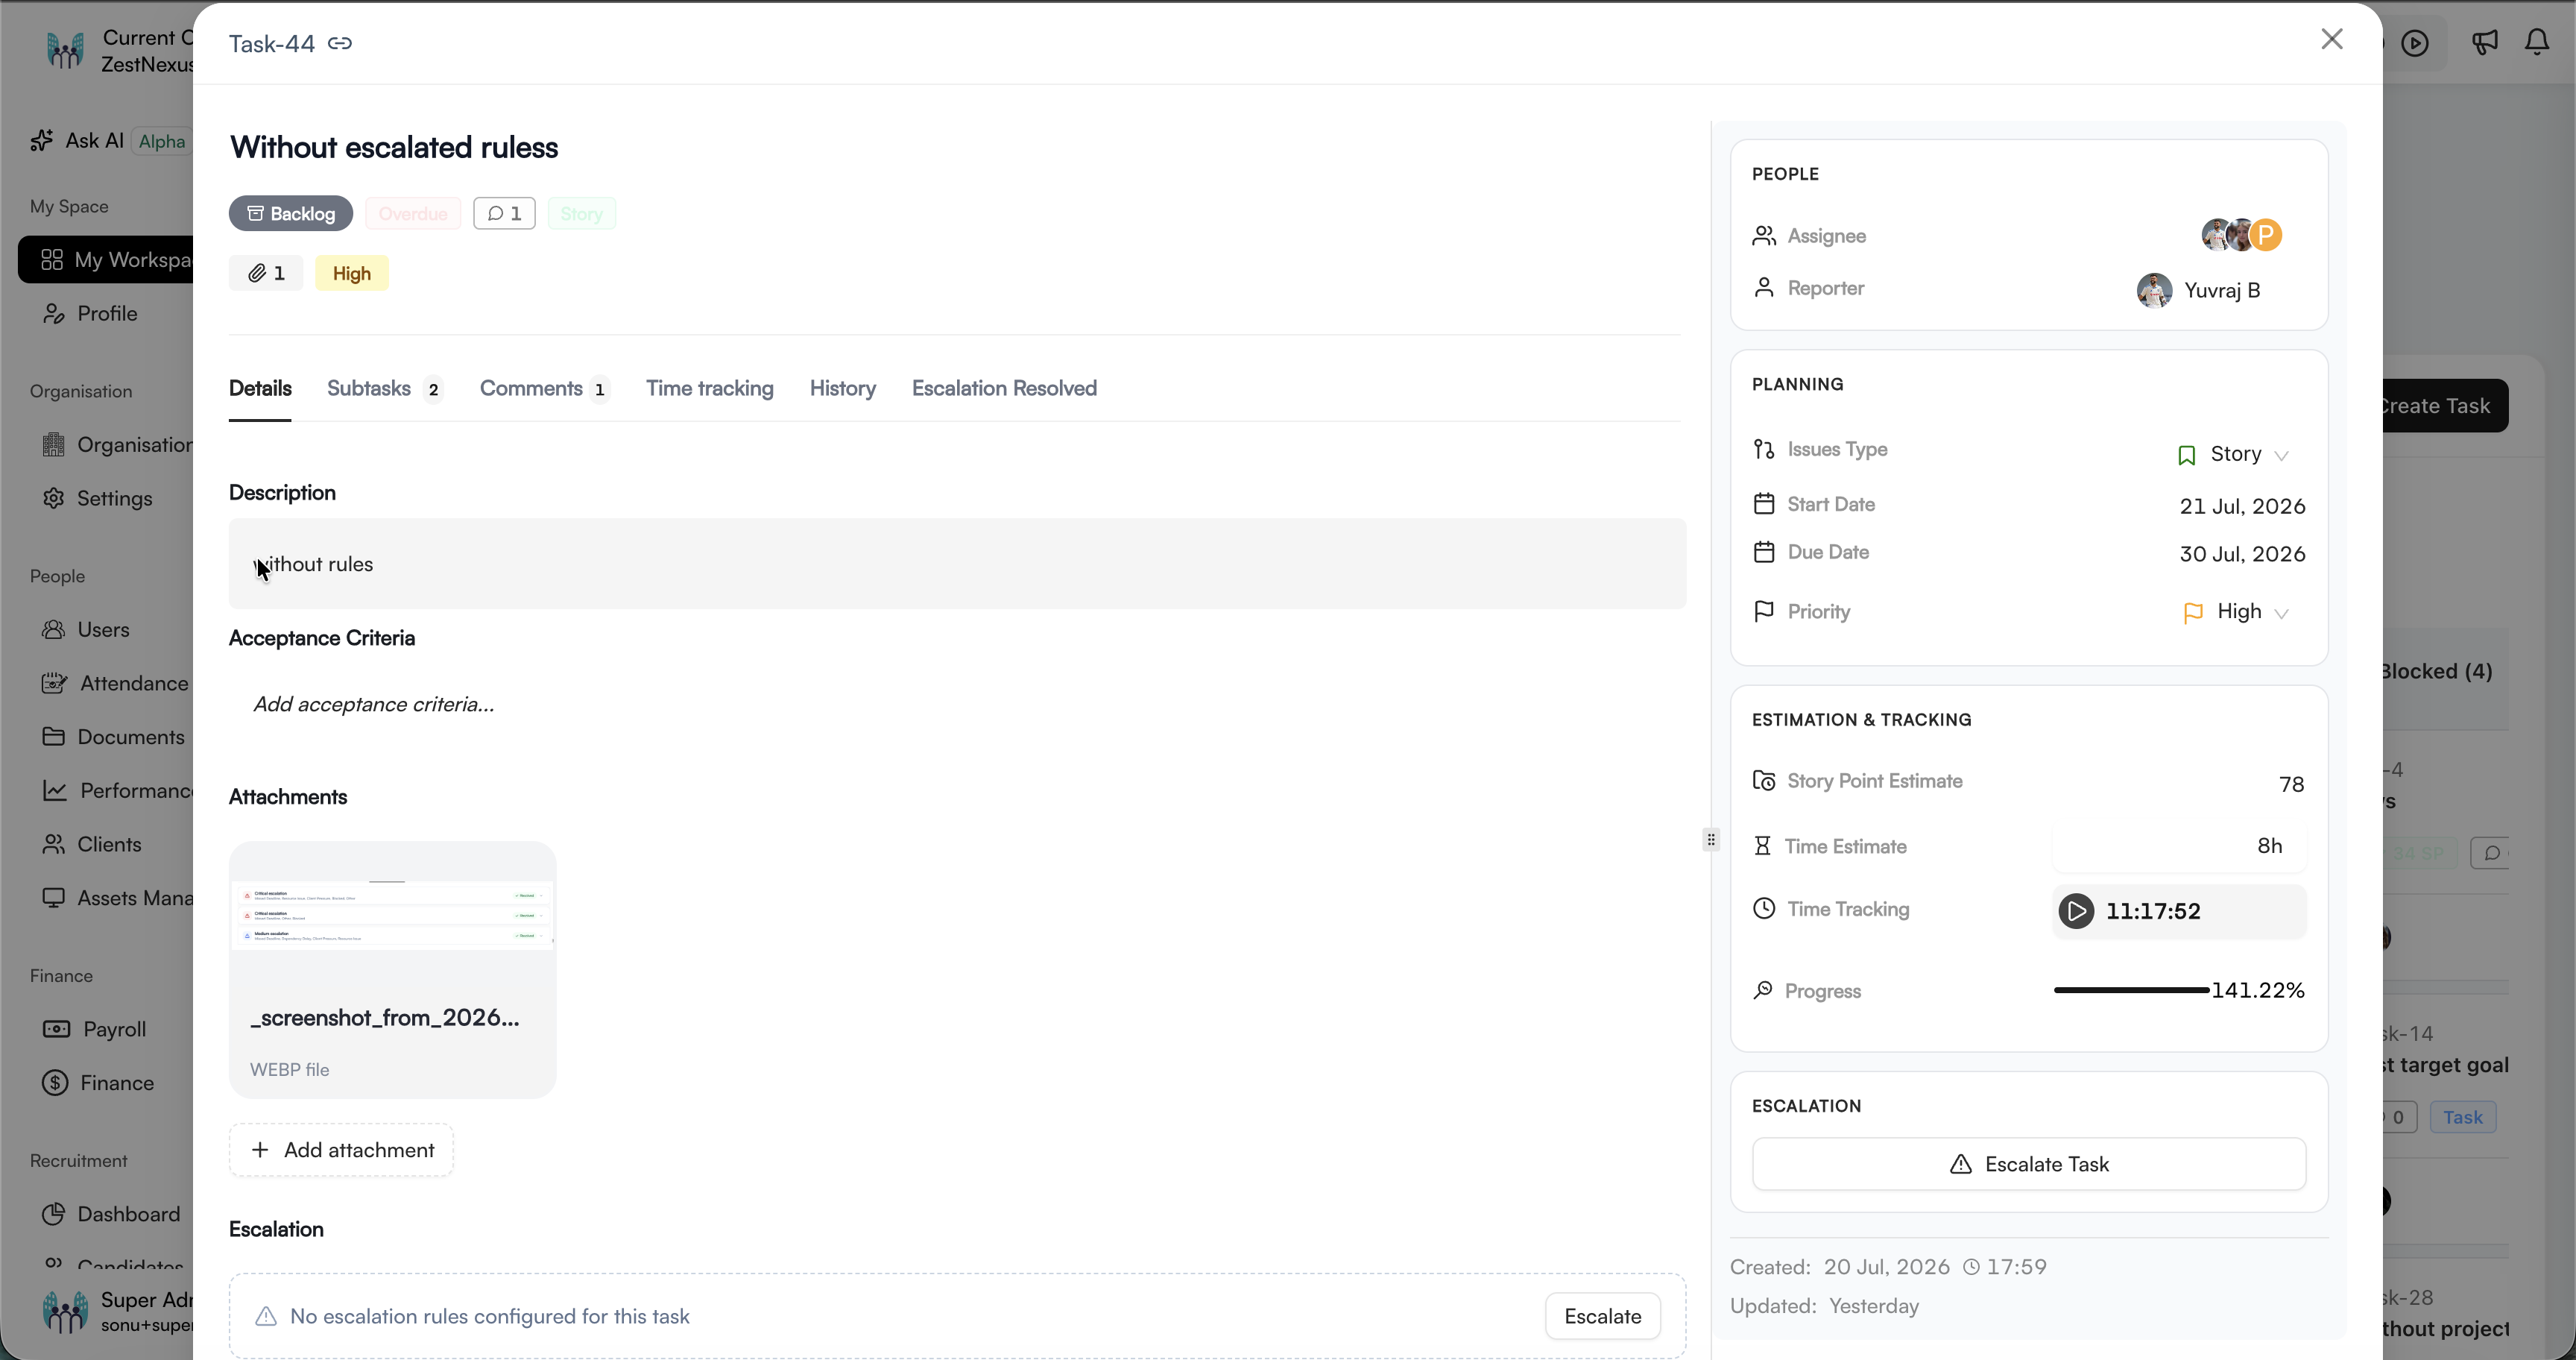
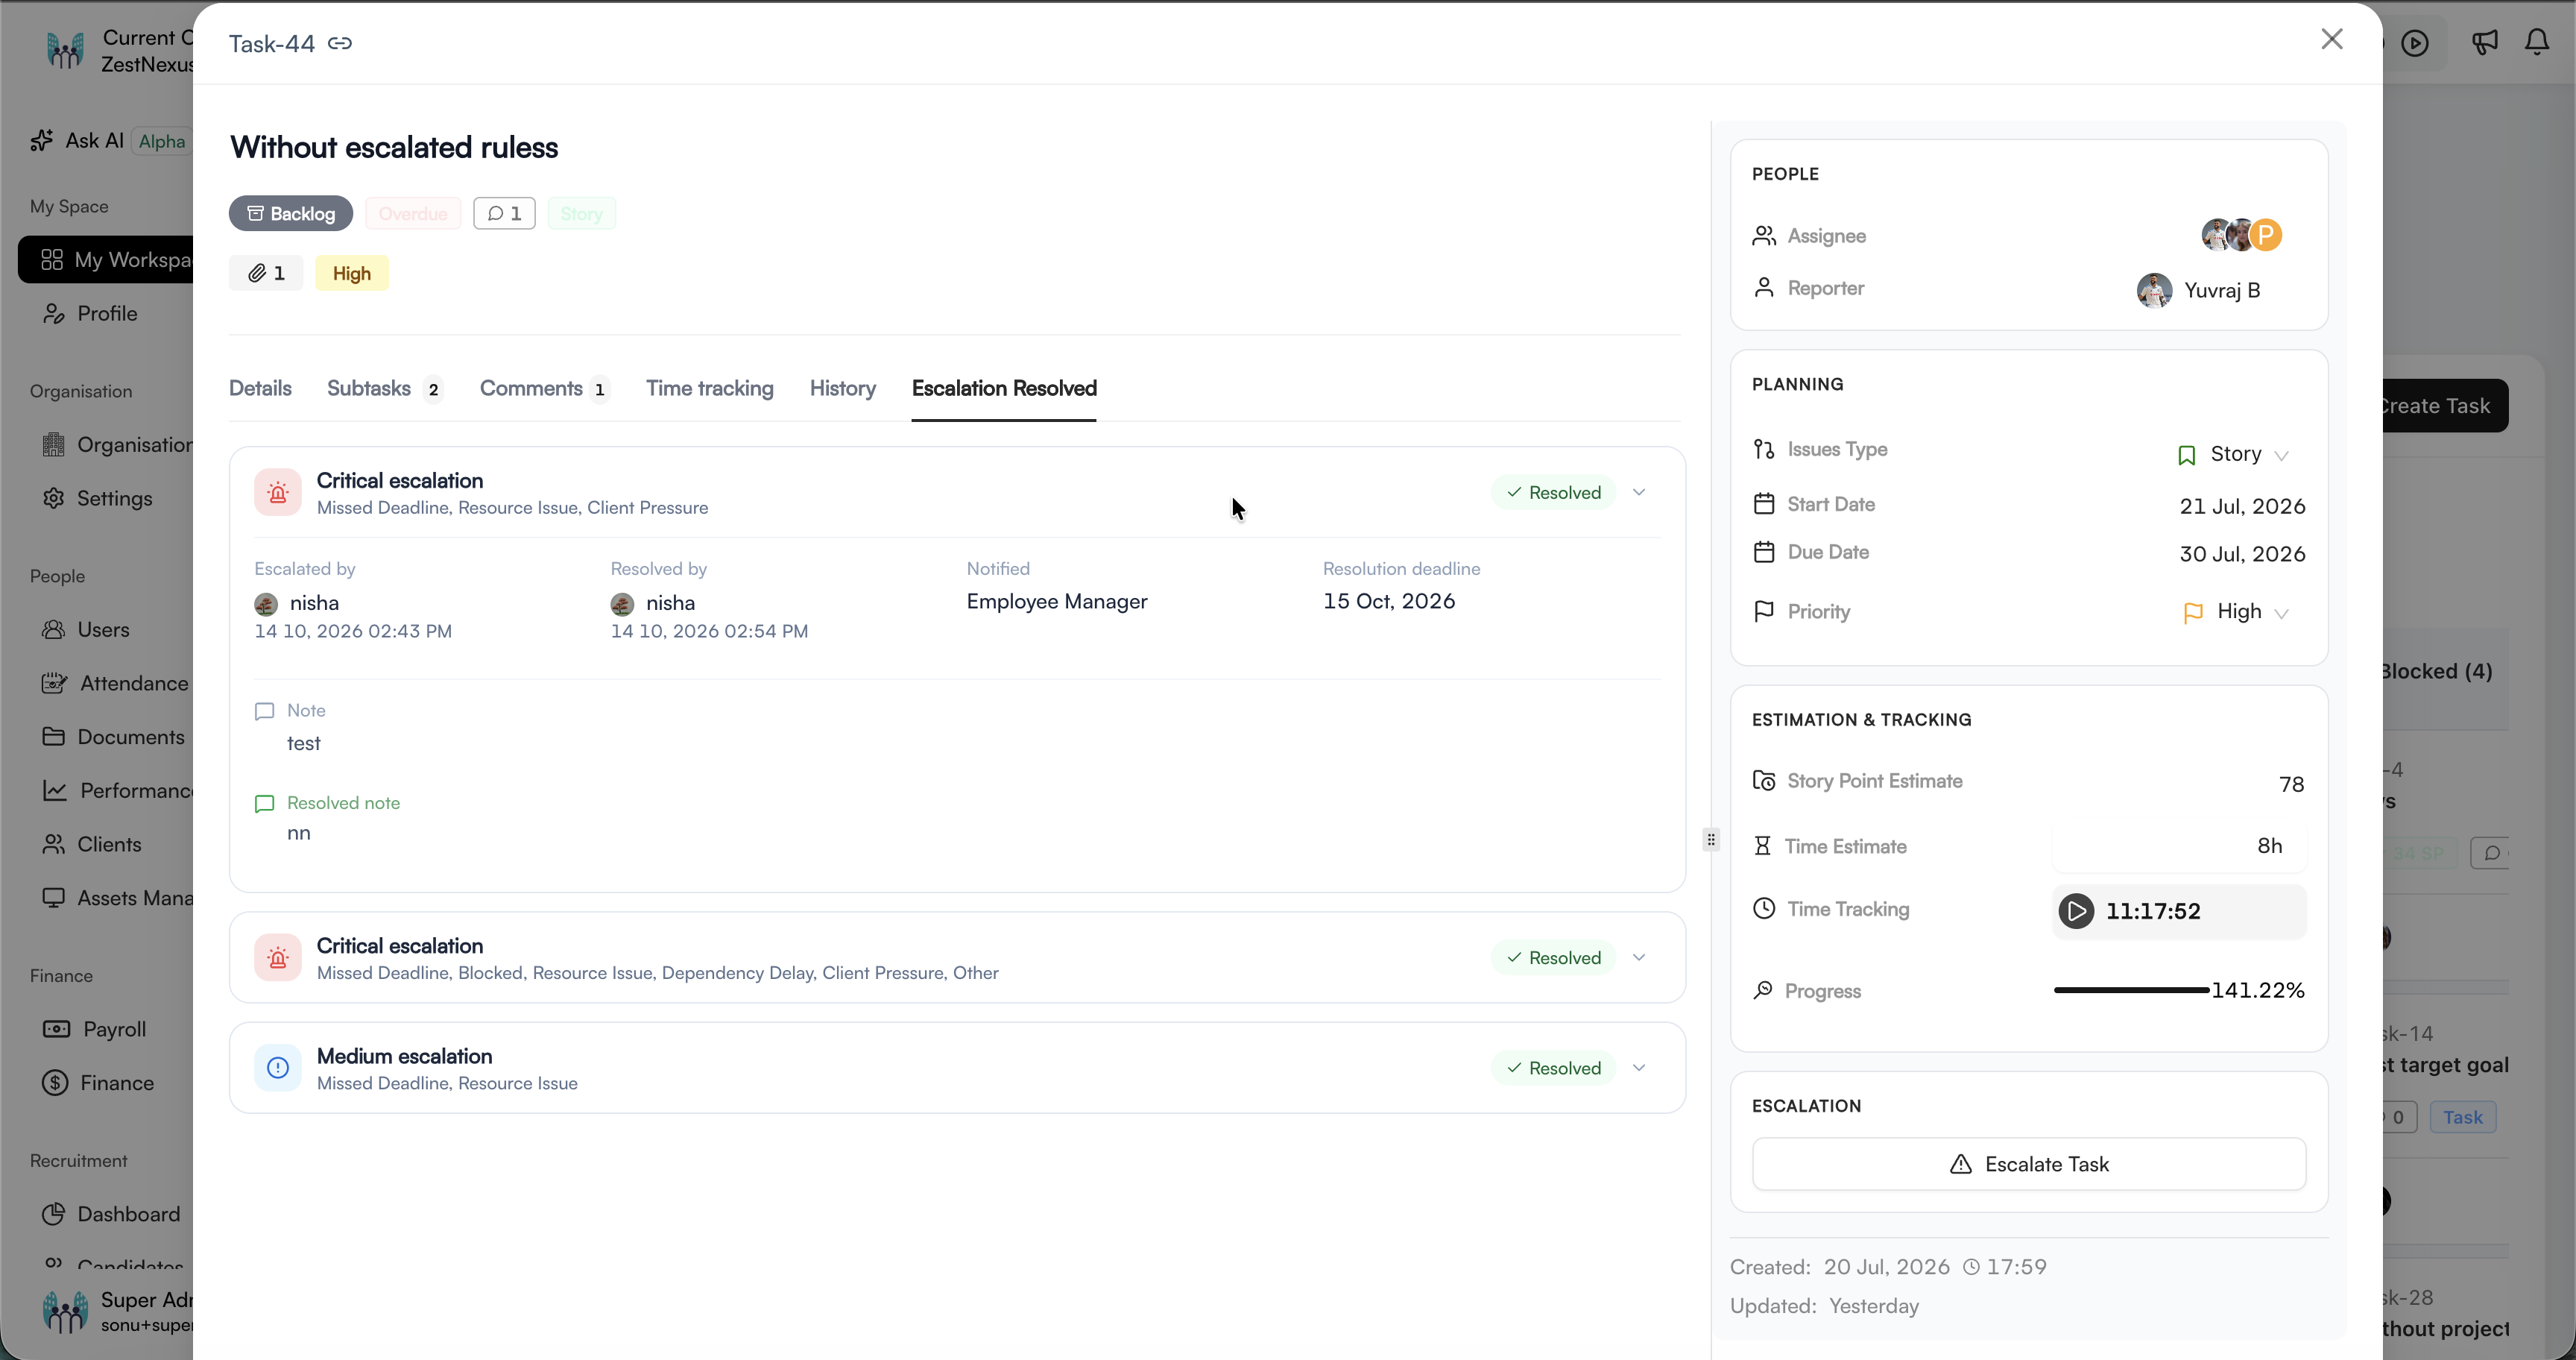
Select a task card to open its details. The header summarizes the task's workflow state and badges. The right side shows people, planning values, story-point and time estimates, tracked time, progress, escalation controls, and created or updated timestamps.
The main area contains Details, Subtasks, Comments, Time tracking, History, and Escalation Resolved tabs.
Details and attachments
The Details tab shows the description, acceptance criteria, and attachments. Use Add attachment to add supporting files. Editable fields and controls depend on your permissions.
Subtasks
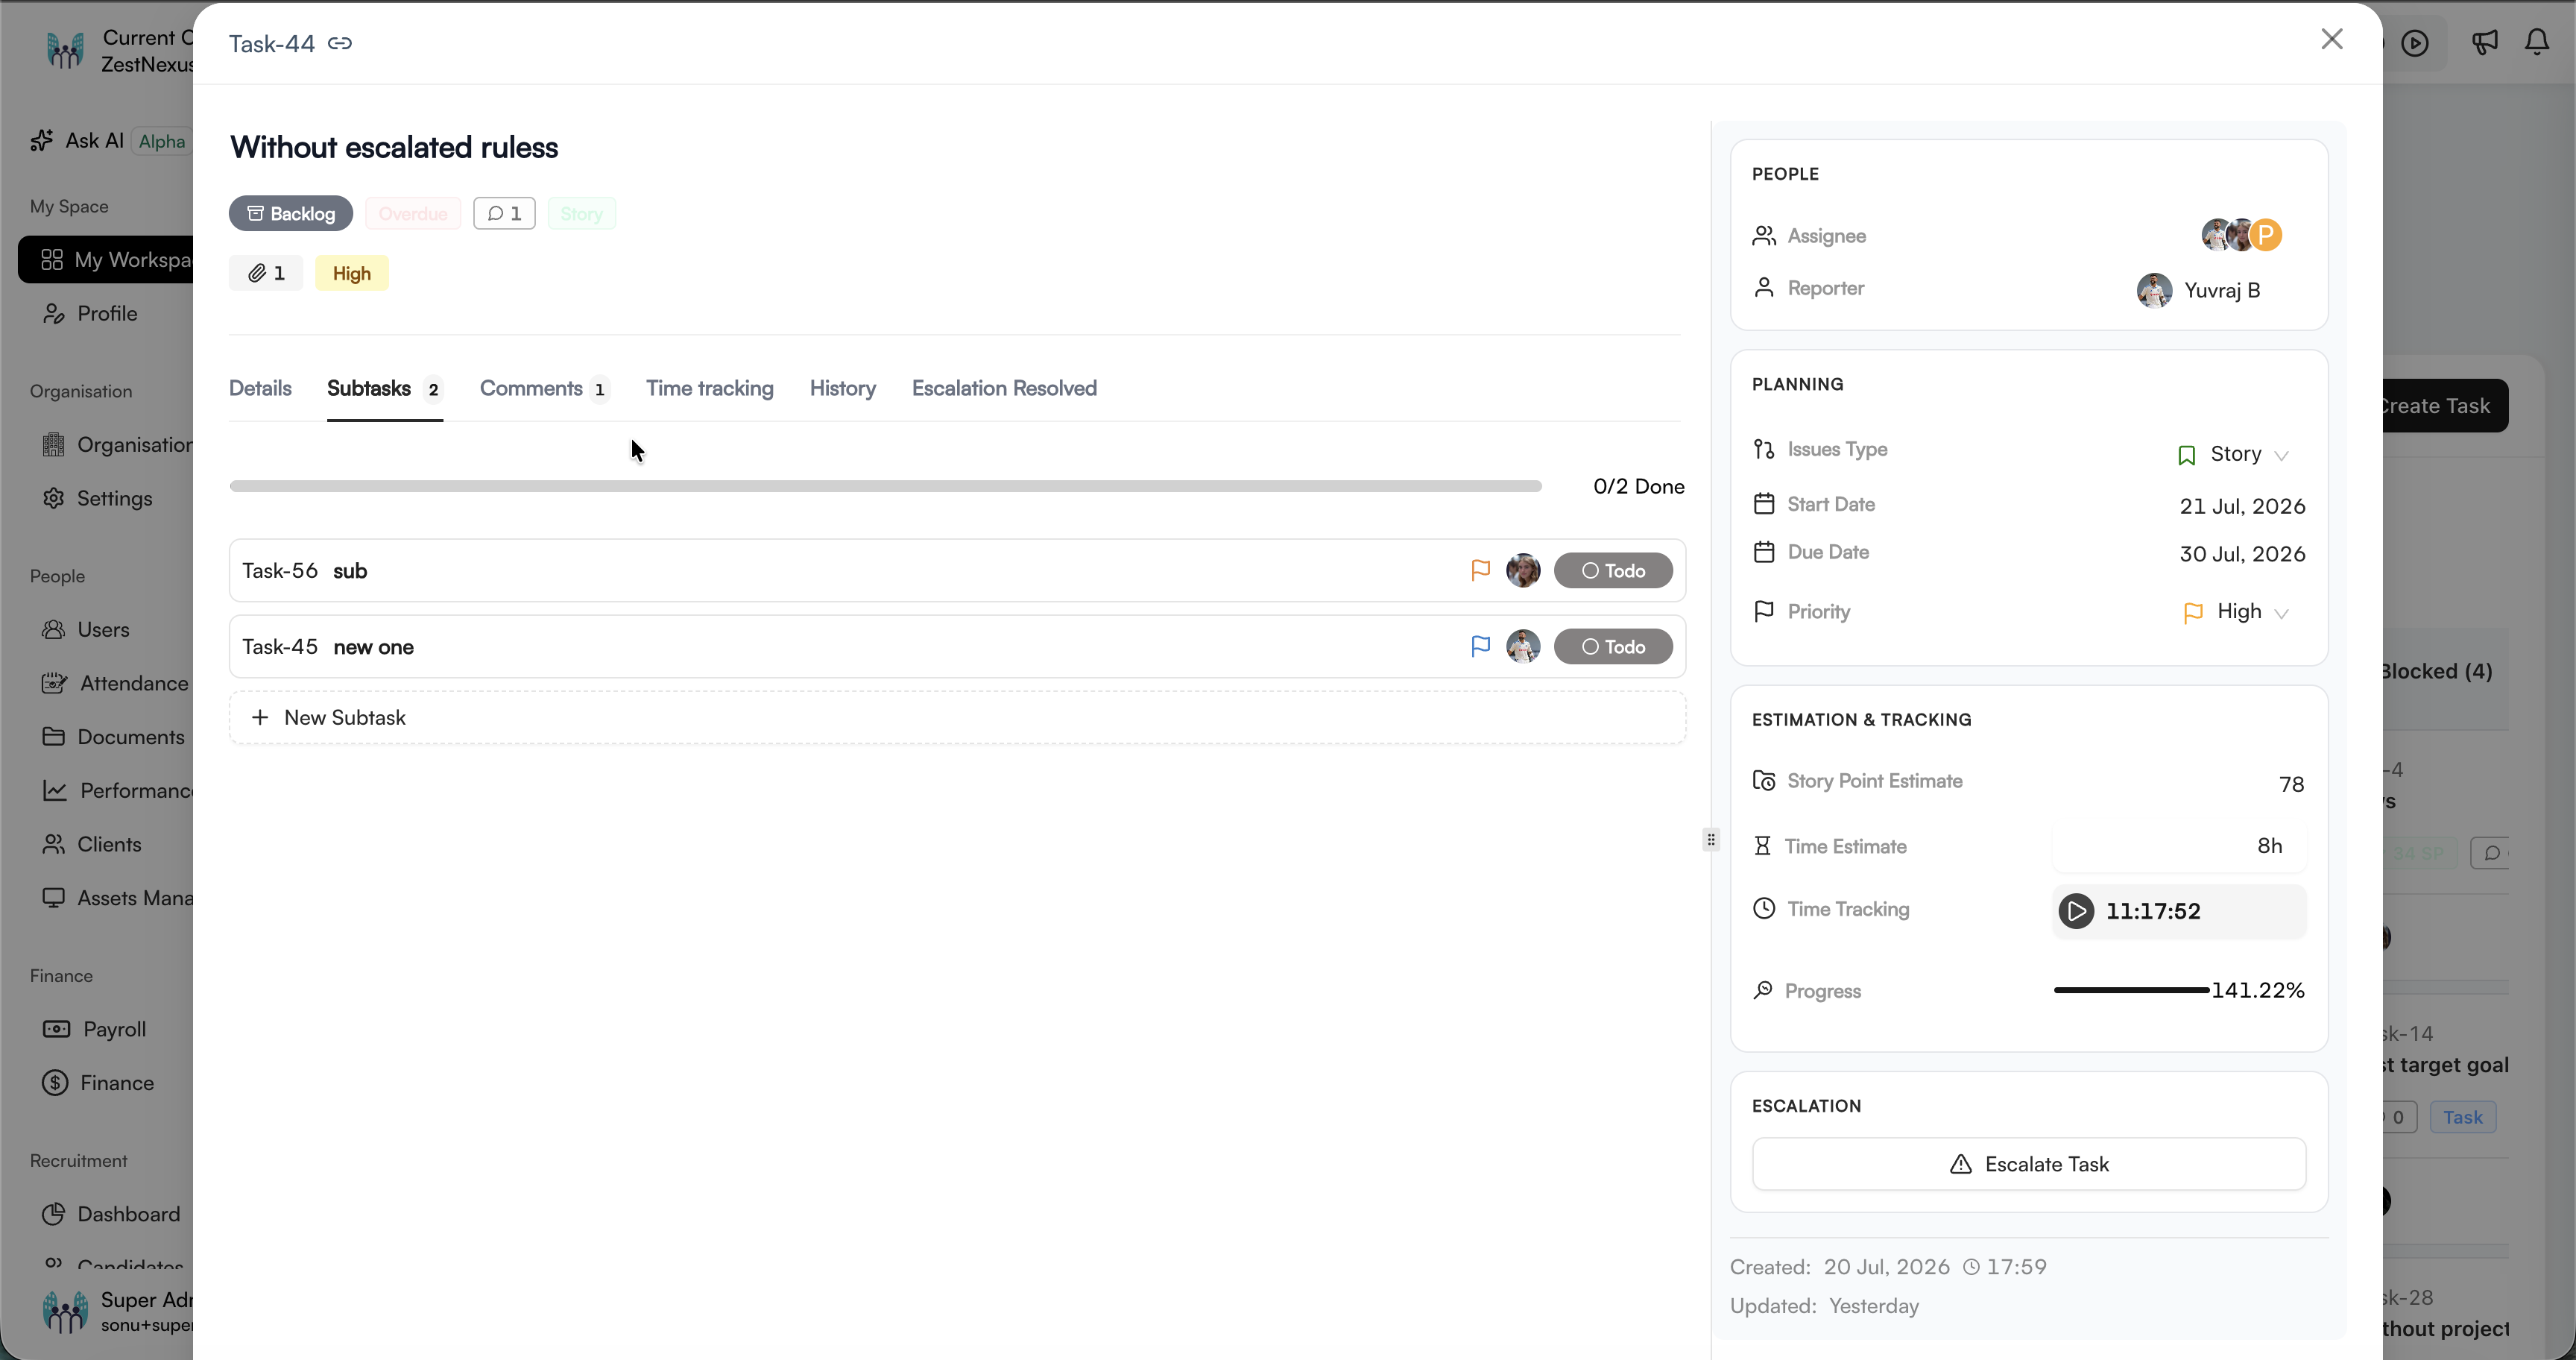
The Subtasks tab shows completion progress and the status, priority, and assignee for each child task. Select a subtask to open it, or select New Subtask to create one.
Comments
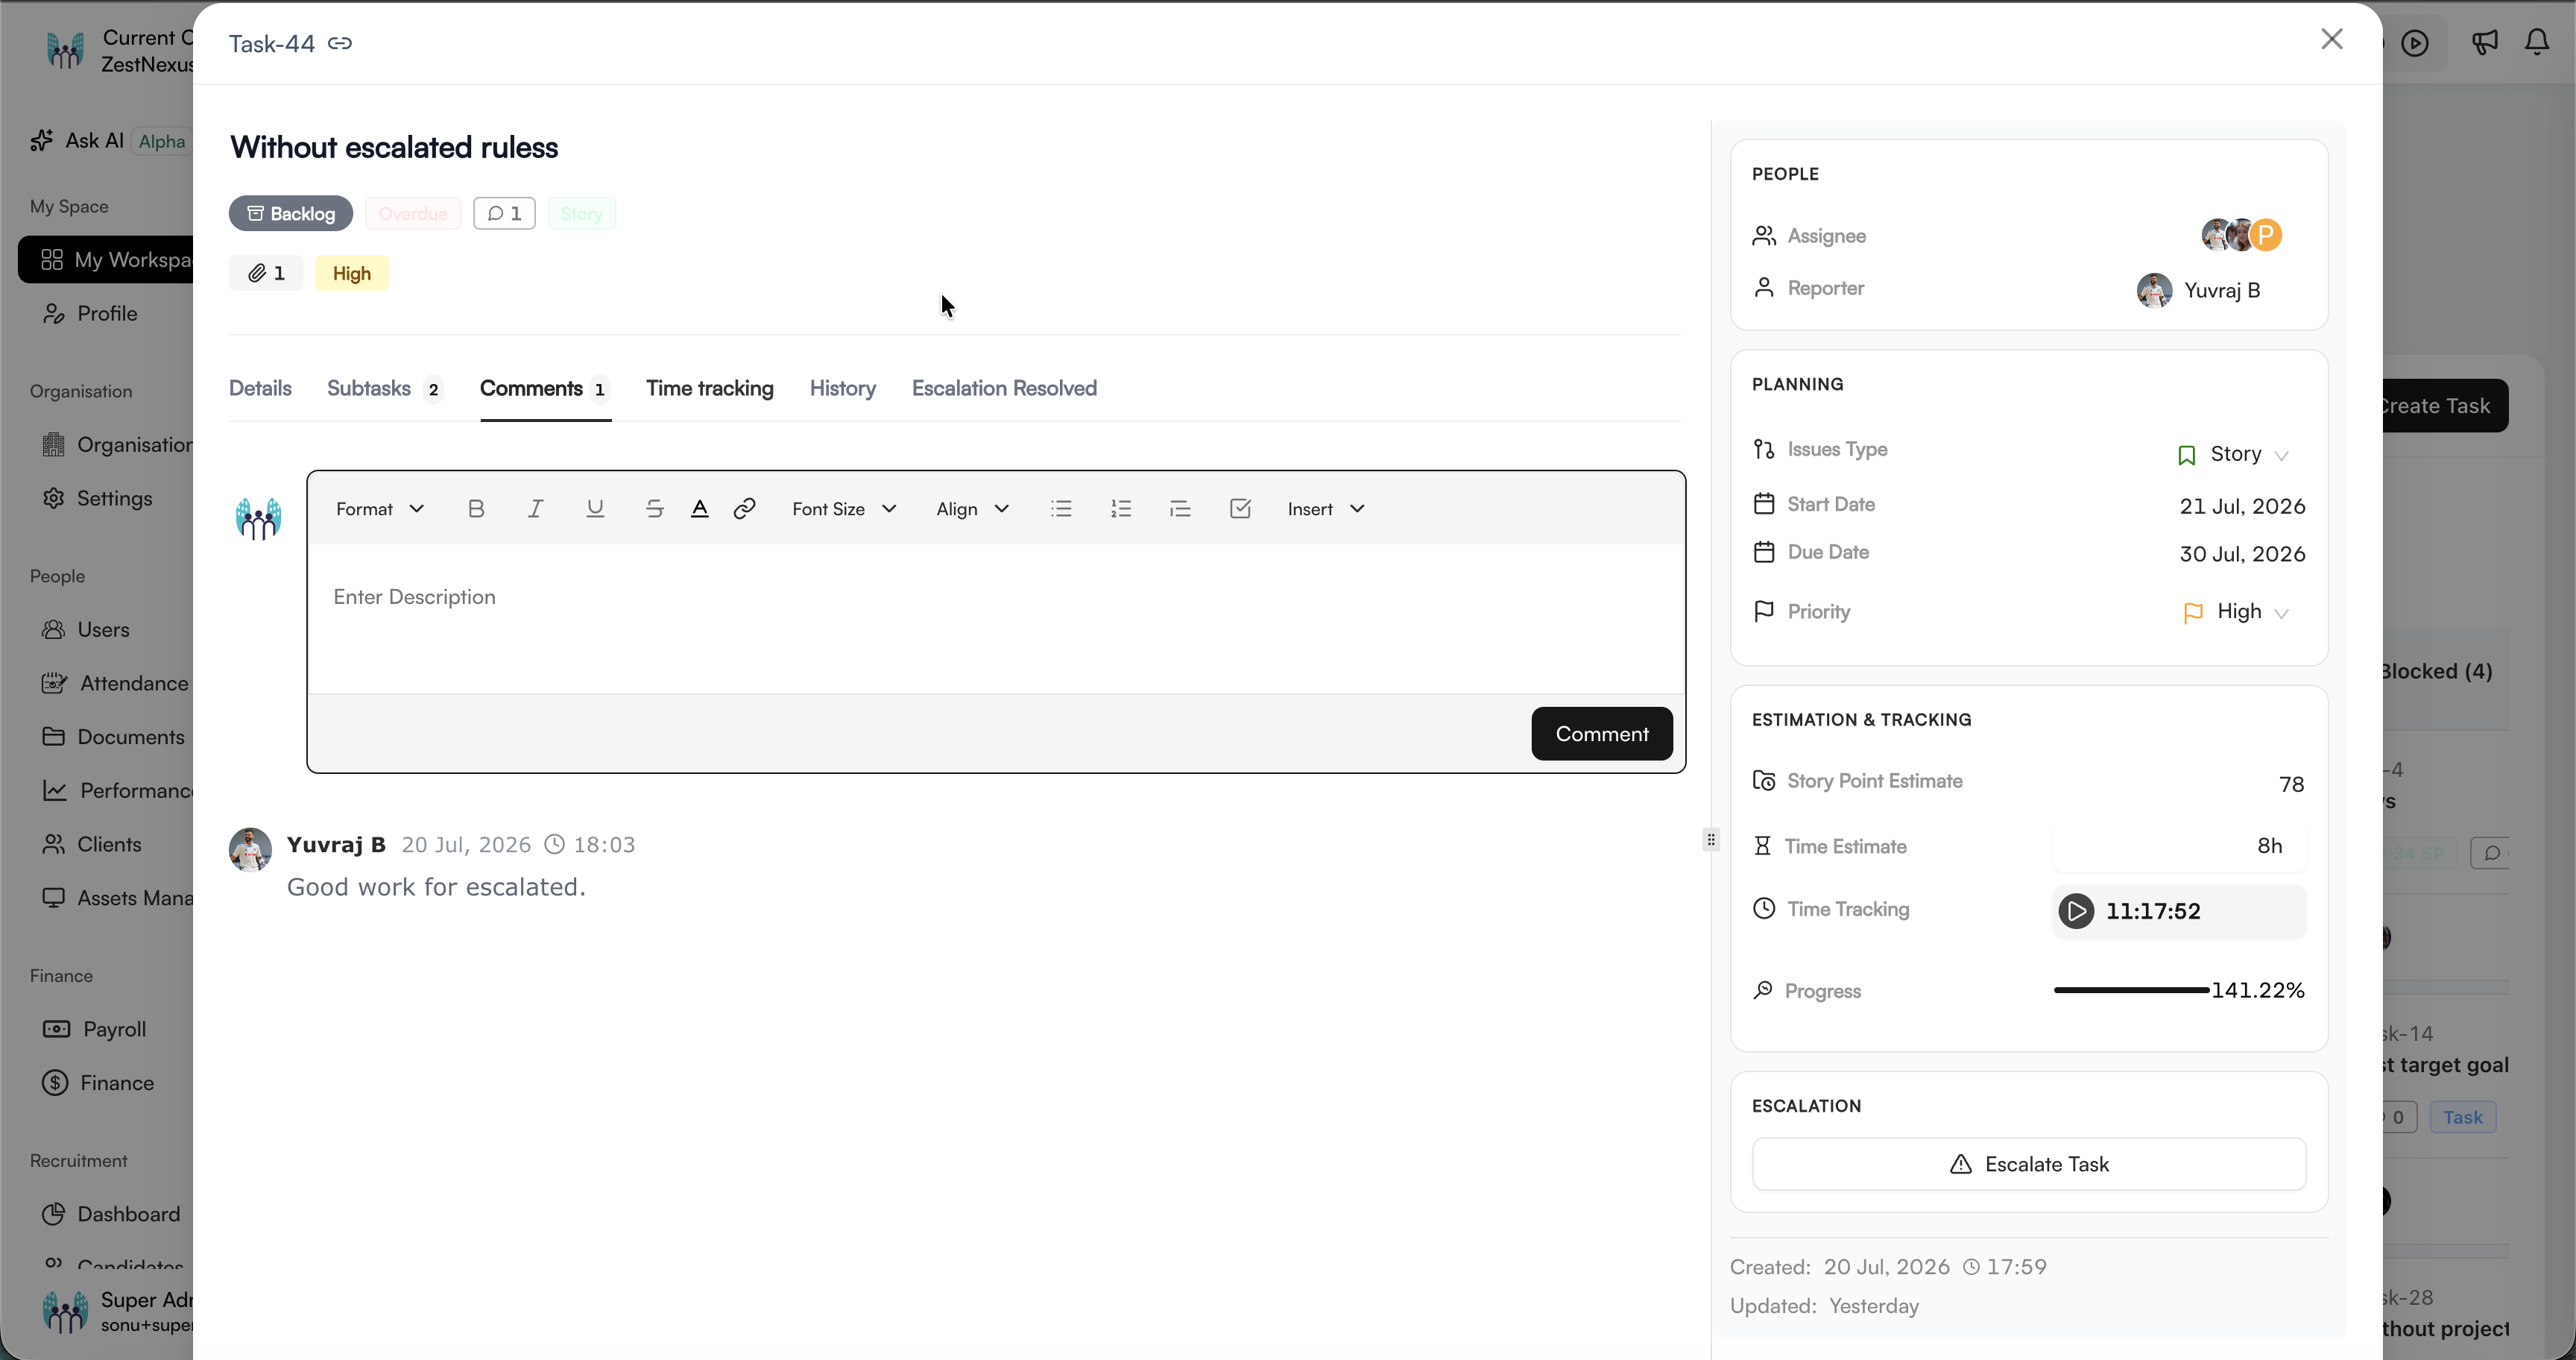
Use the Comments tab to add formatted updates and review previous discussion. The editor supports common text formatting, lists, links, alignment, and inserted content.
Time tracking
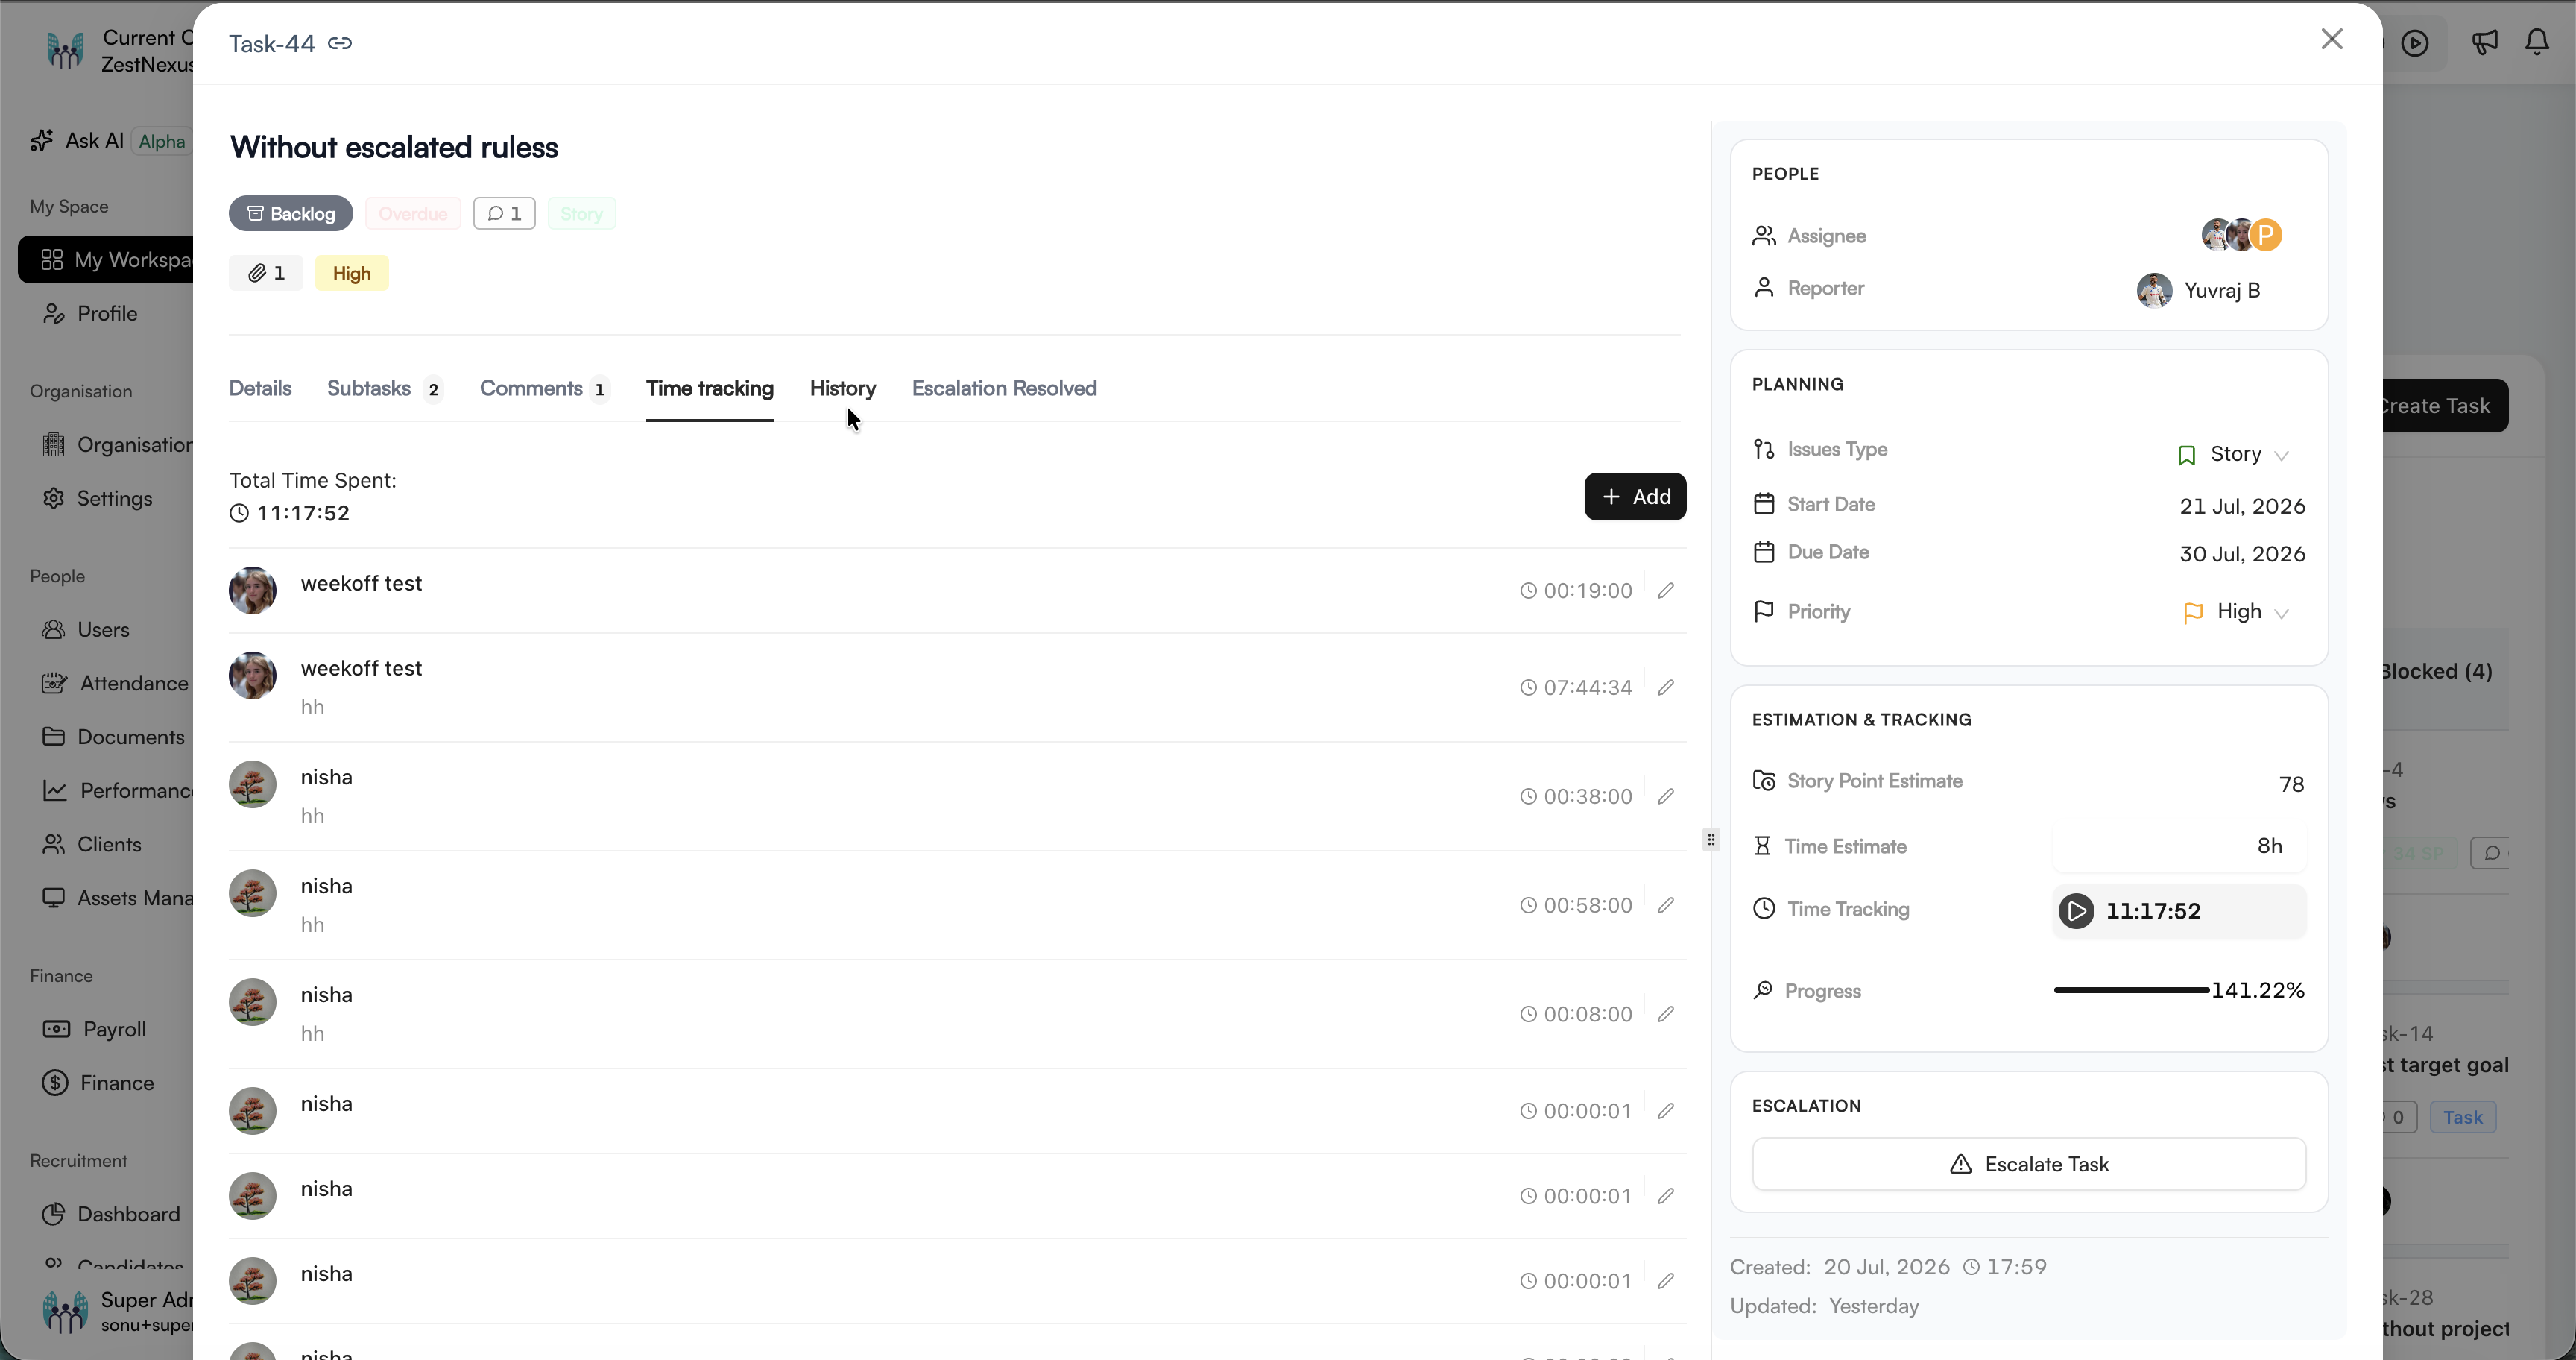
The Time tracking tab shows the total logged time and individual entries by contributor. Select Add to log time, or use the edit icon beside an entry when you are permitted to update it.
History
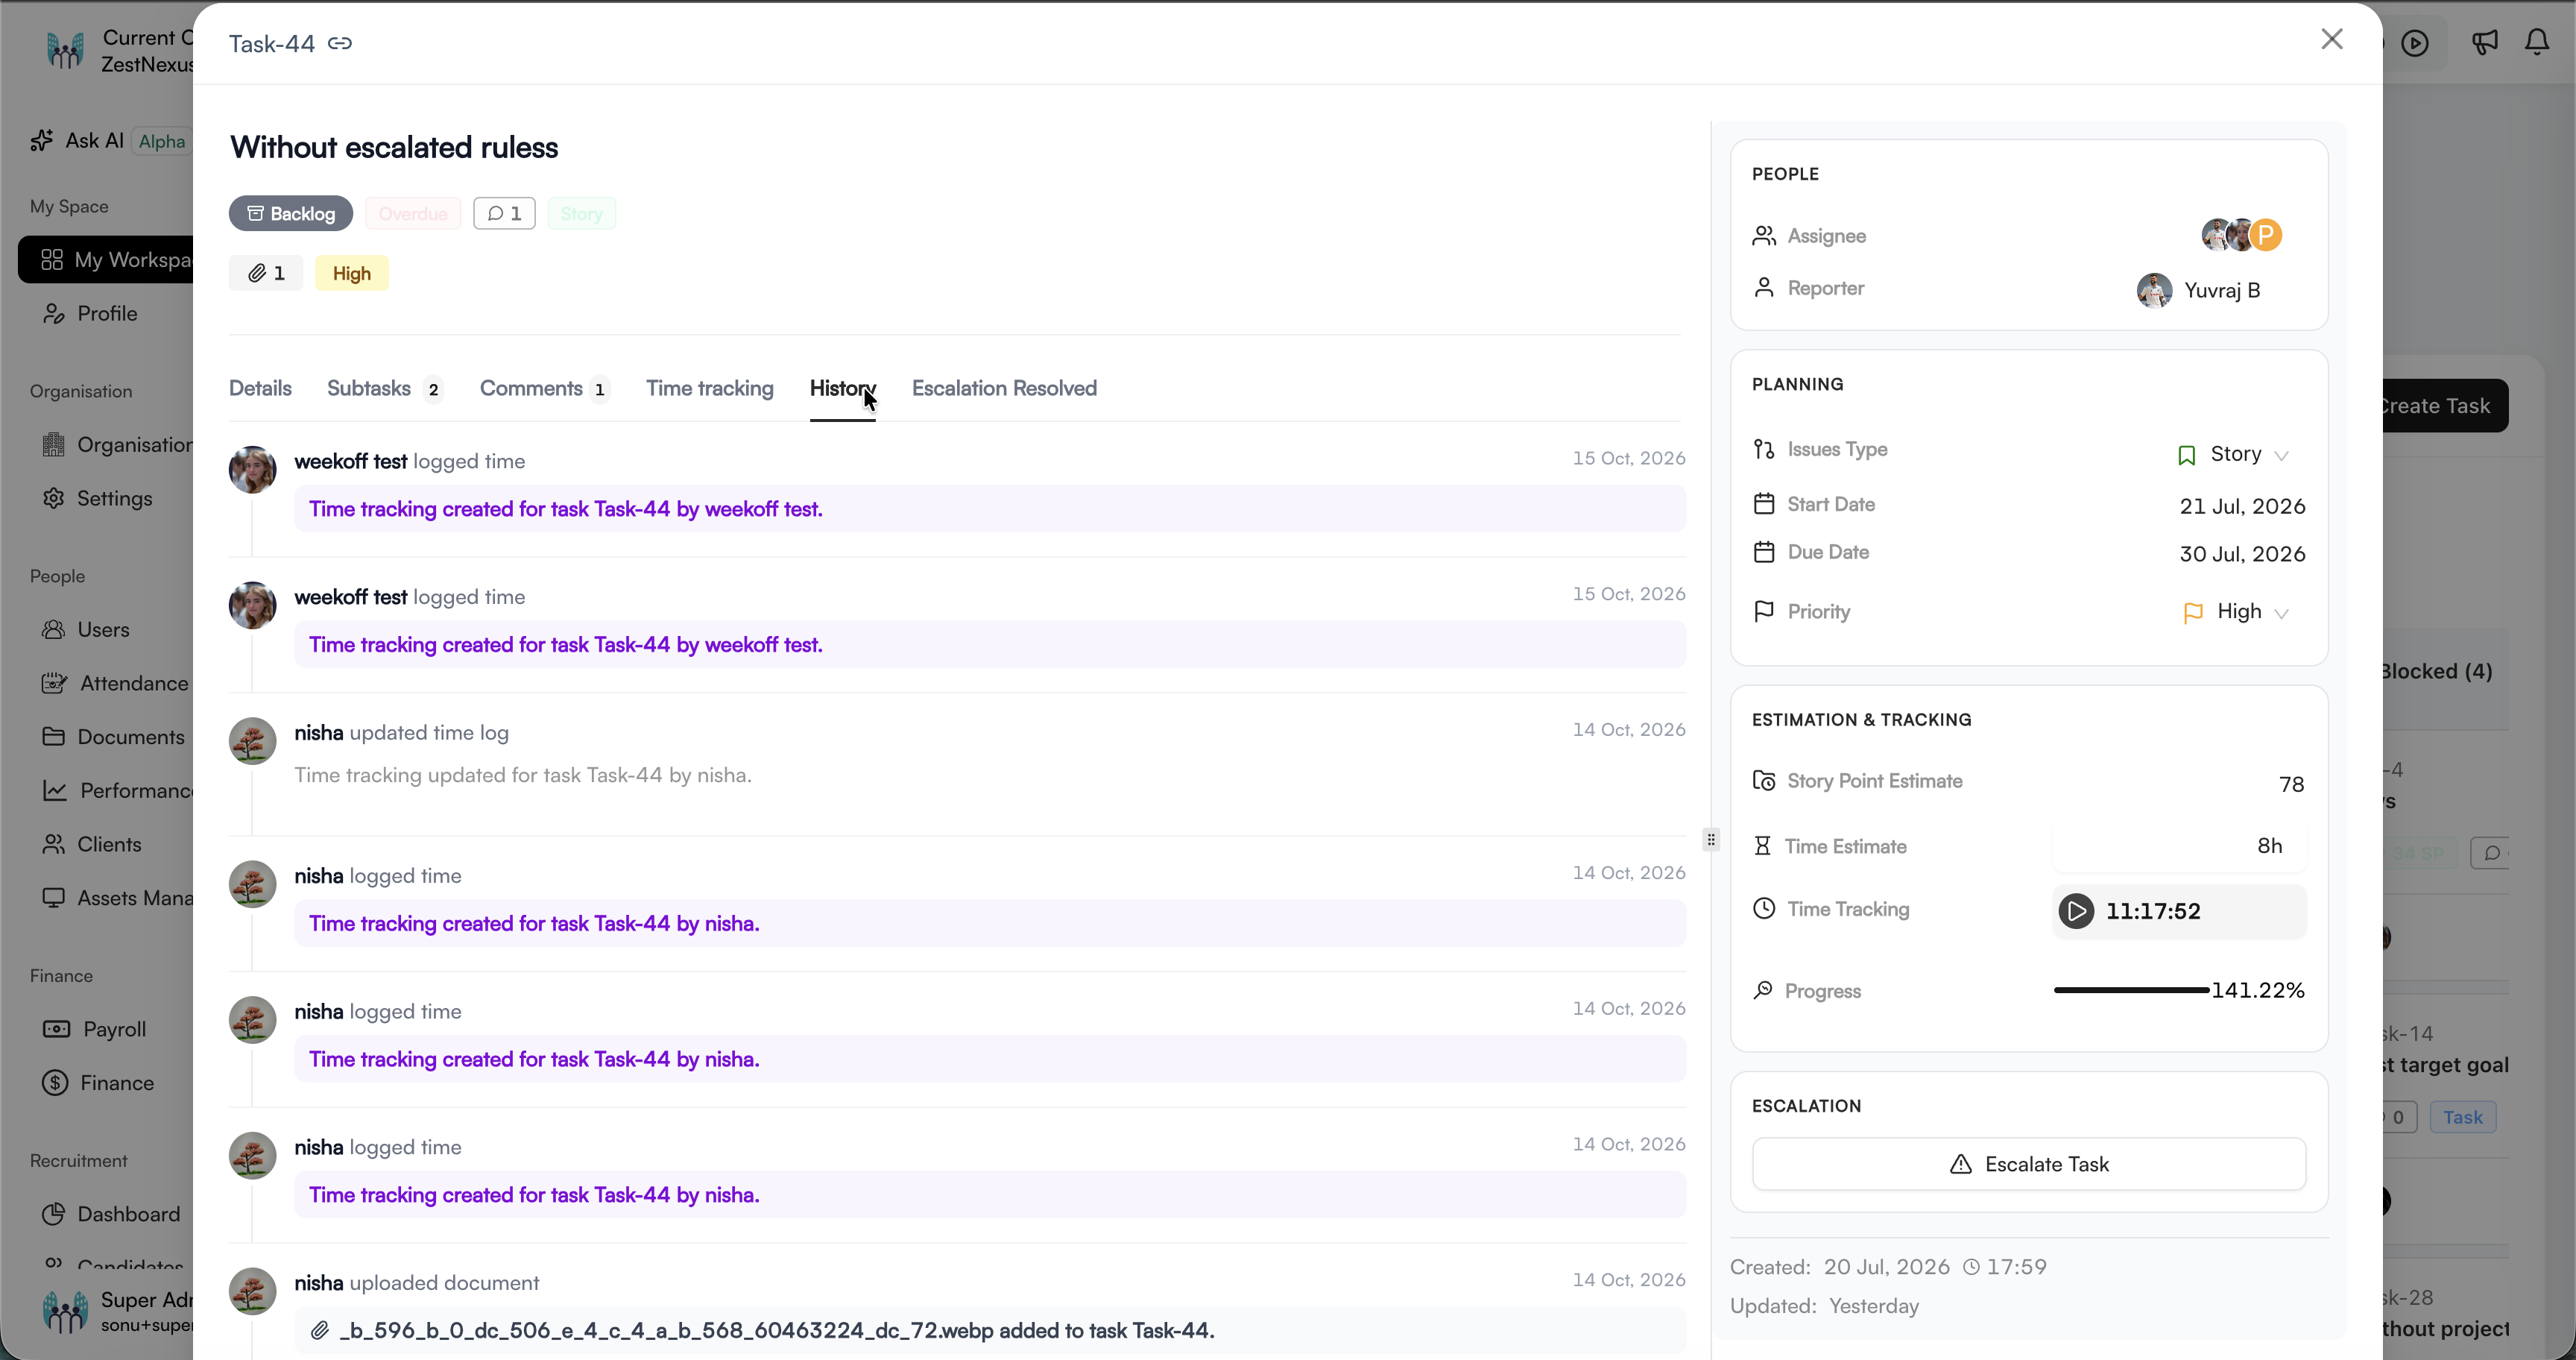
The History tab records task activity, including time-log creation and updates, uploaded documents, and other recorded changes.
Task escalations
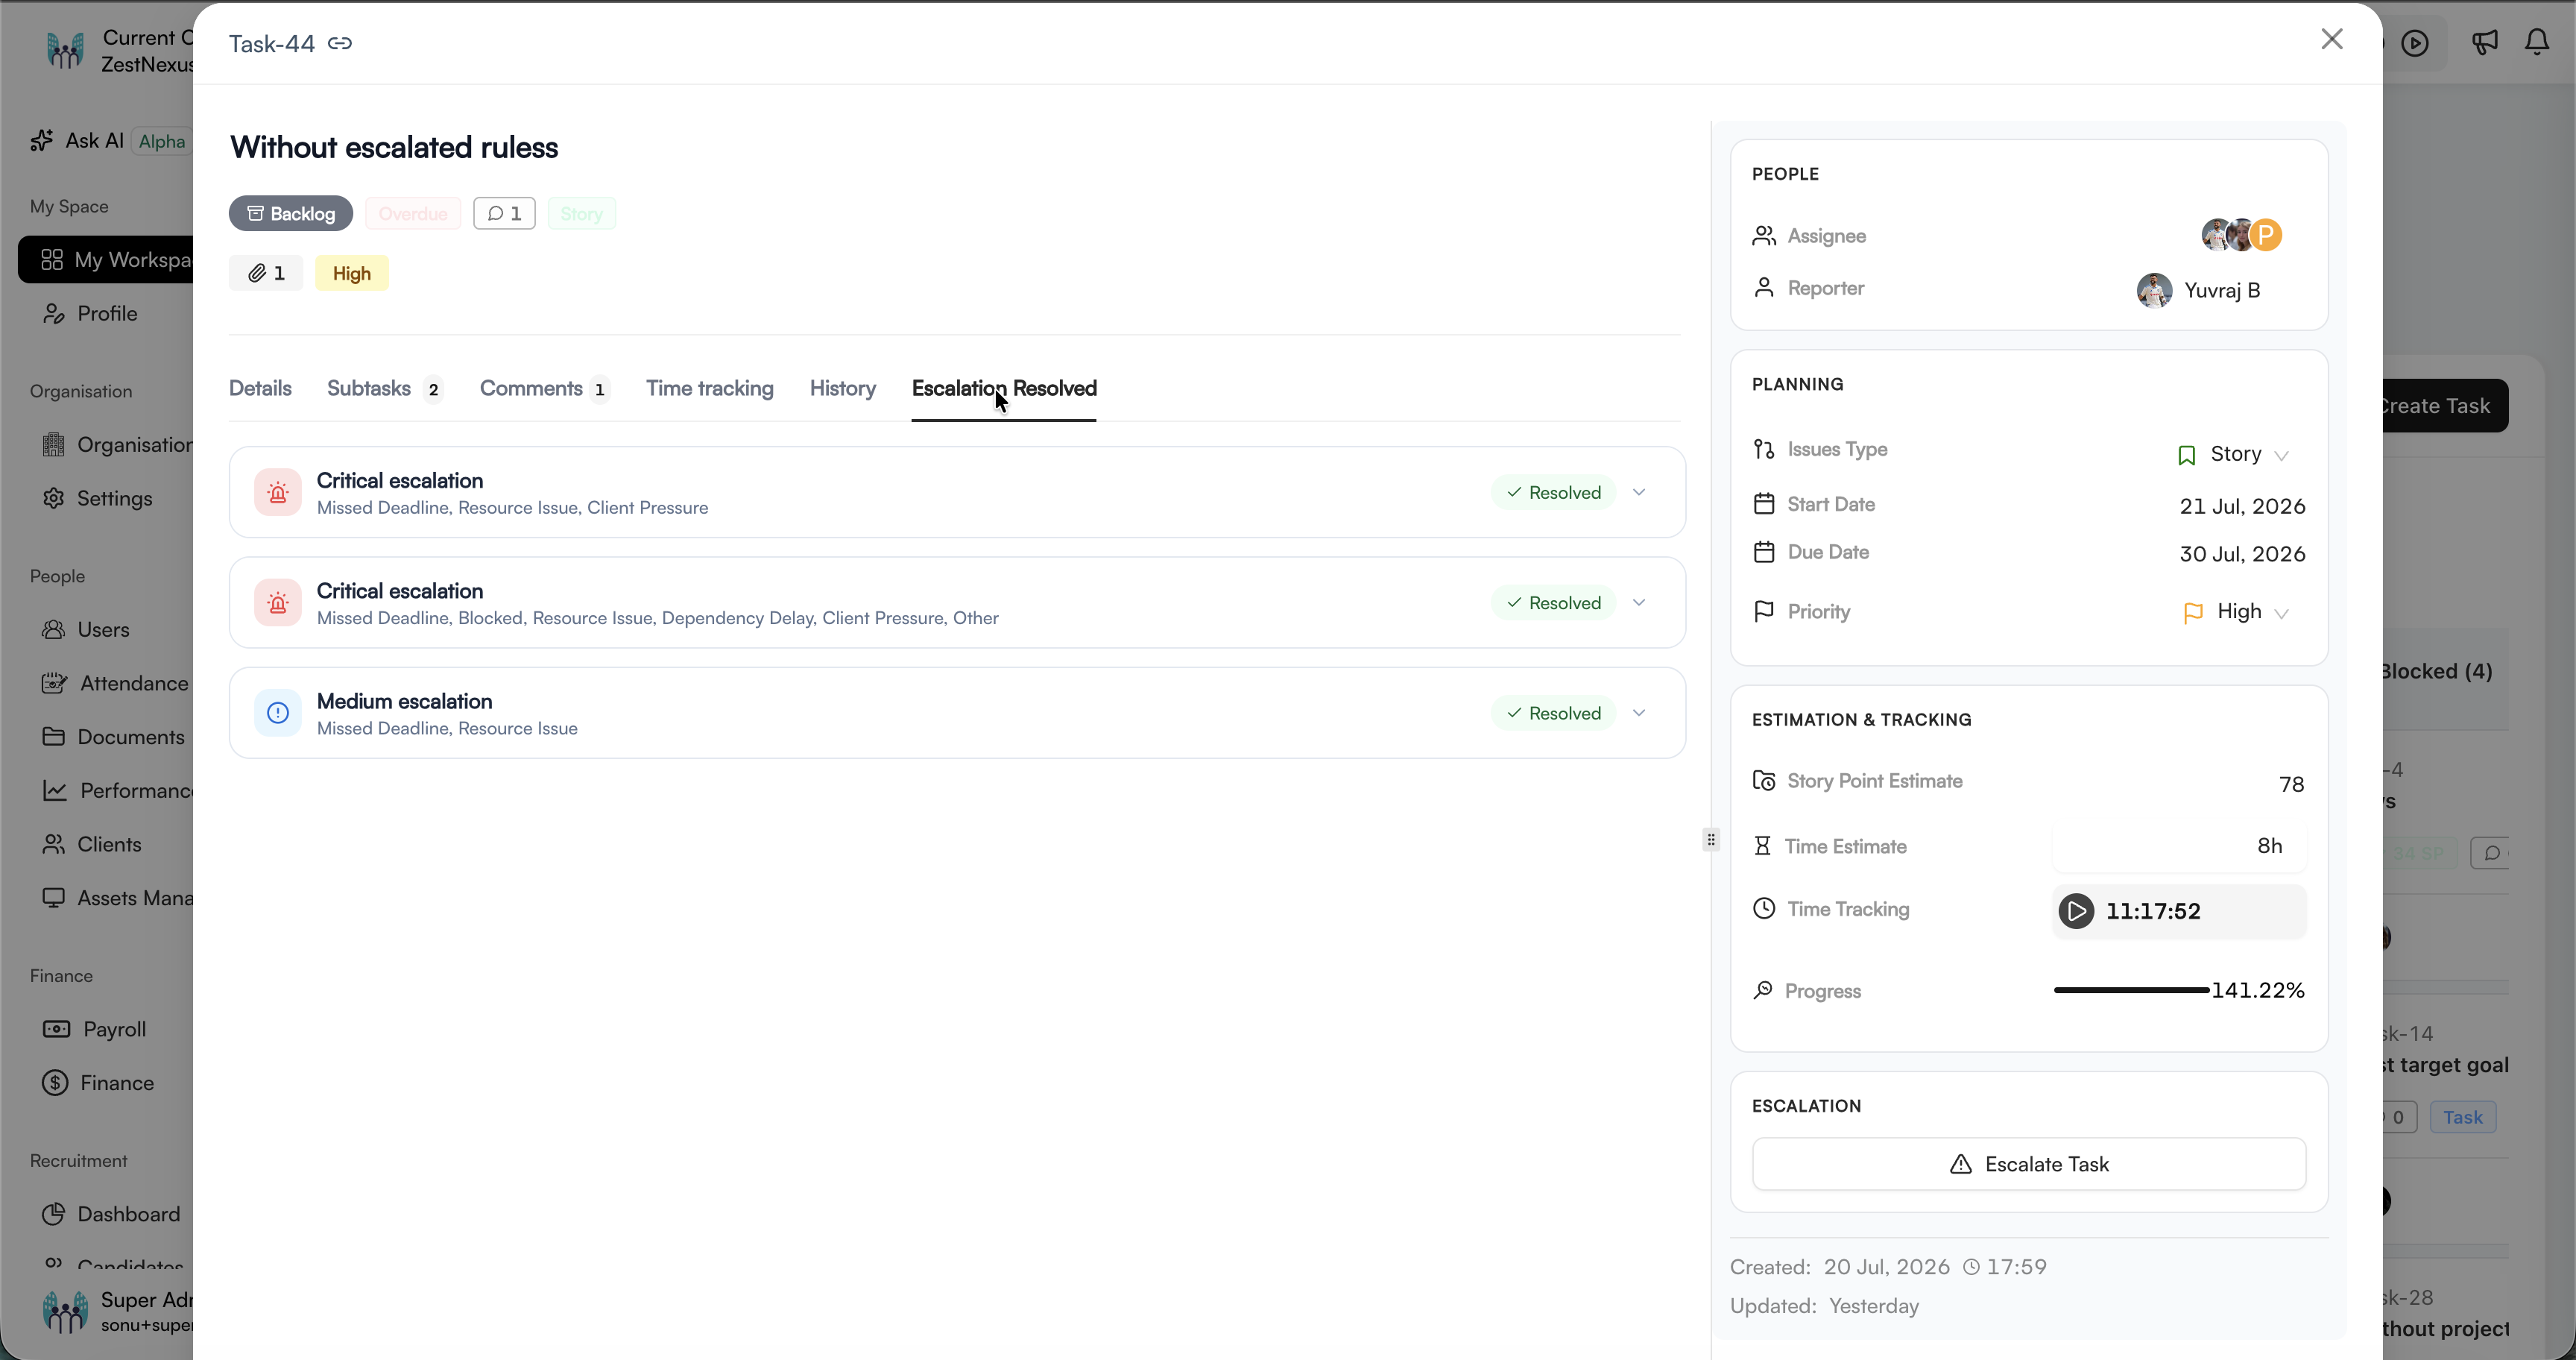
The Escalation Resolved tab lists resolved escalations with their severity and reasons. Expand an item to review who escalated and resolved it, the notified role, resolution deadline, original note, and resolution note.
Escalate a task manually
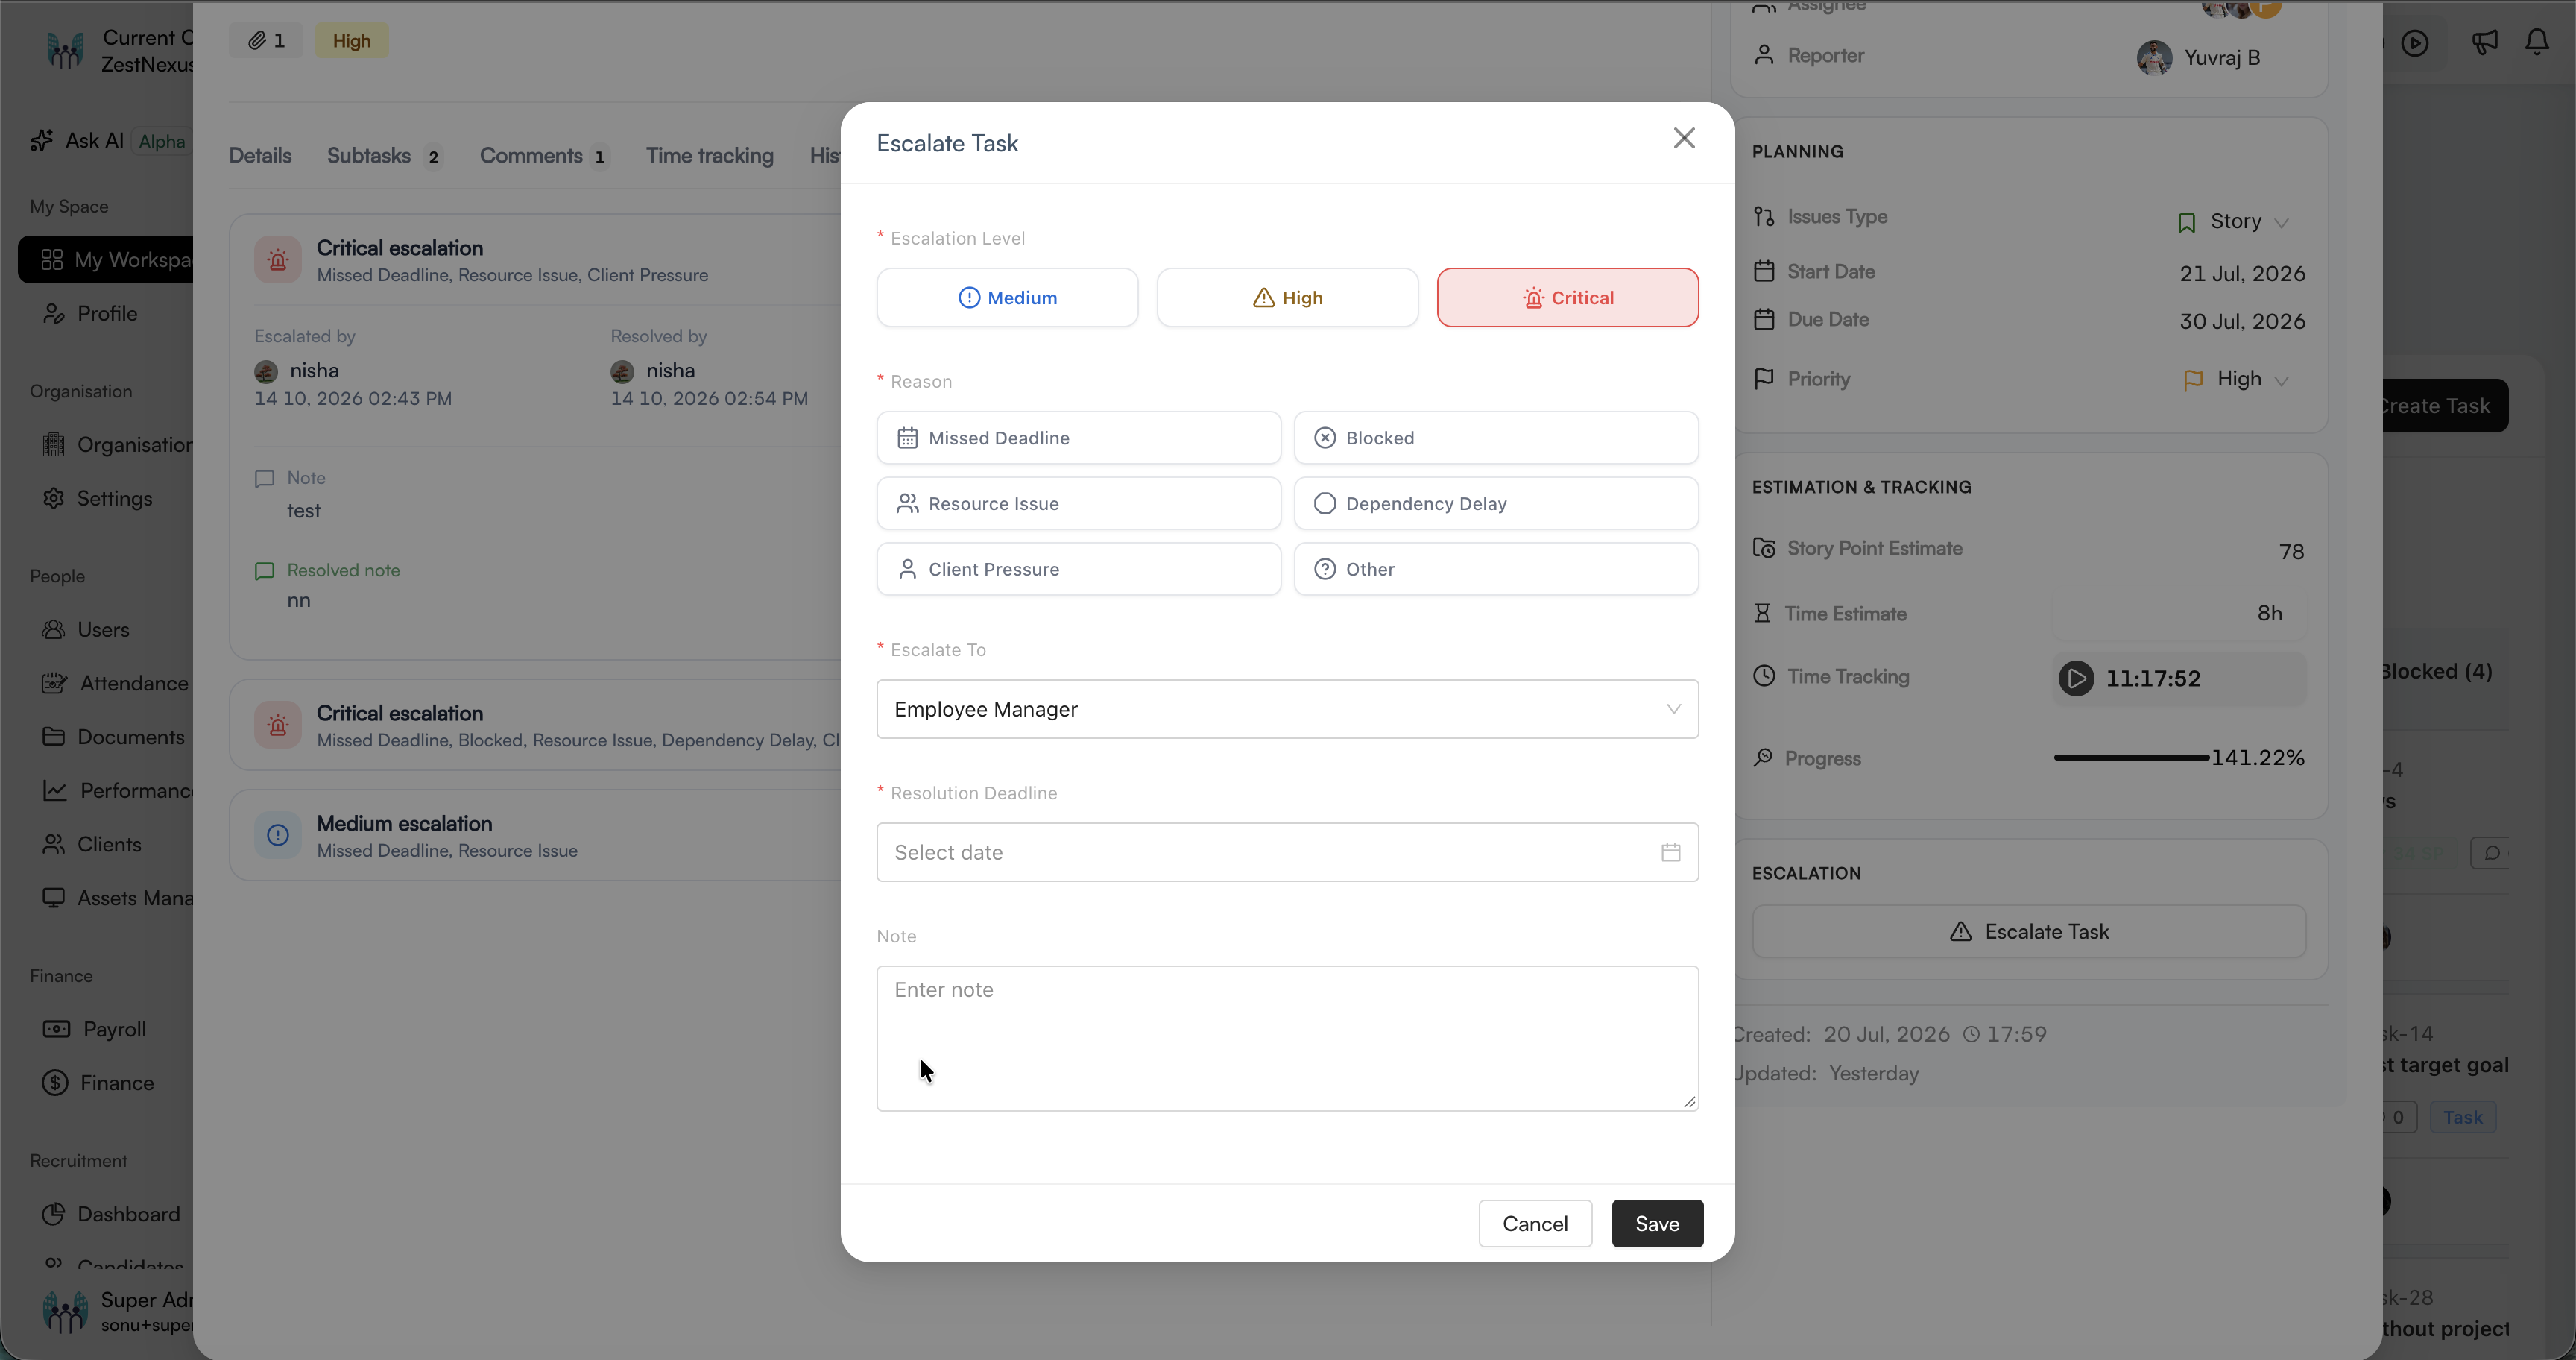
Select Escalate Task from the task's escalation panel. Then:
- Select an escalation level: Medium, High, or Critical.
- Select one or more reasons, such as missed deadline, blocked work, resource issue, dependency delay, client pressure, or other.
- Choose who should receive the escalation.
- Set the required resolution deadline.
- Add an optional note and select Save.
Projects
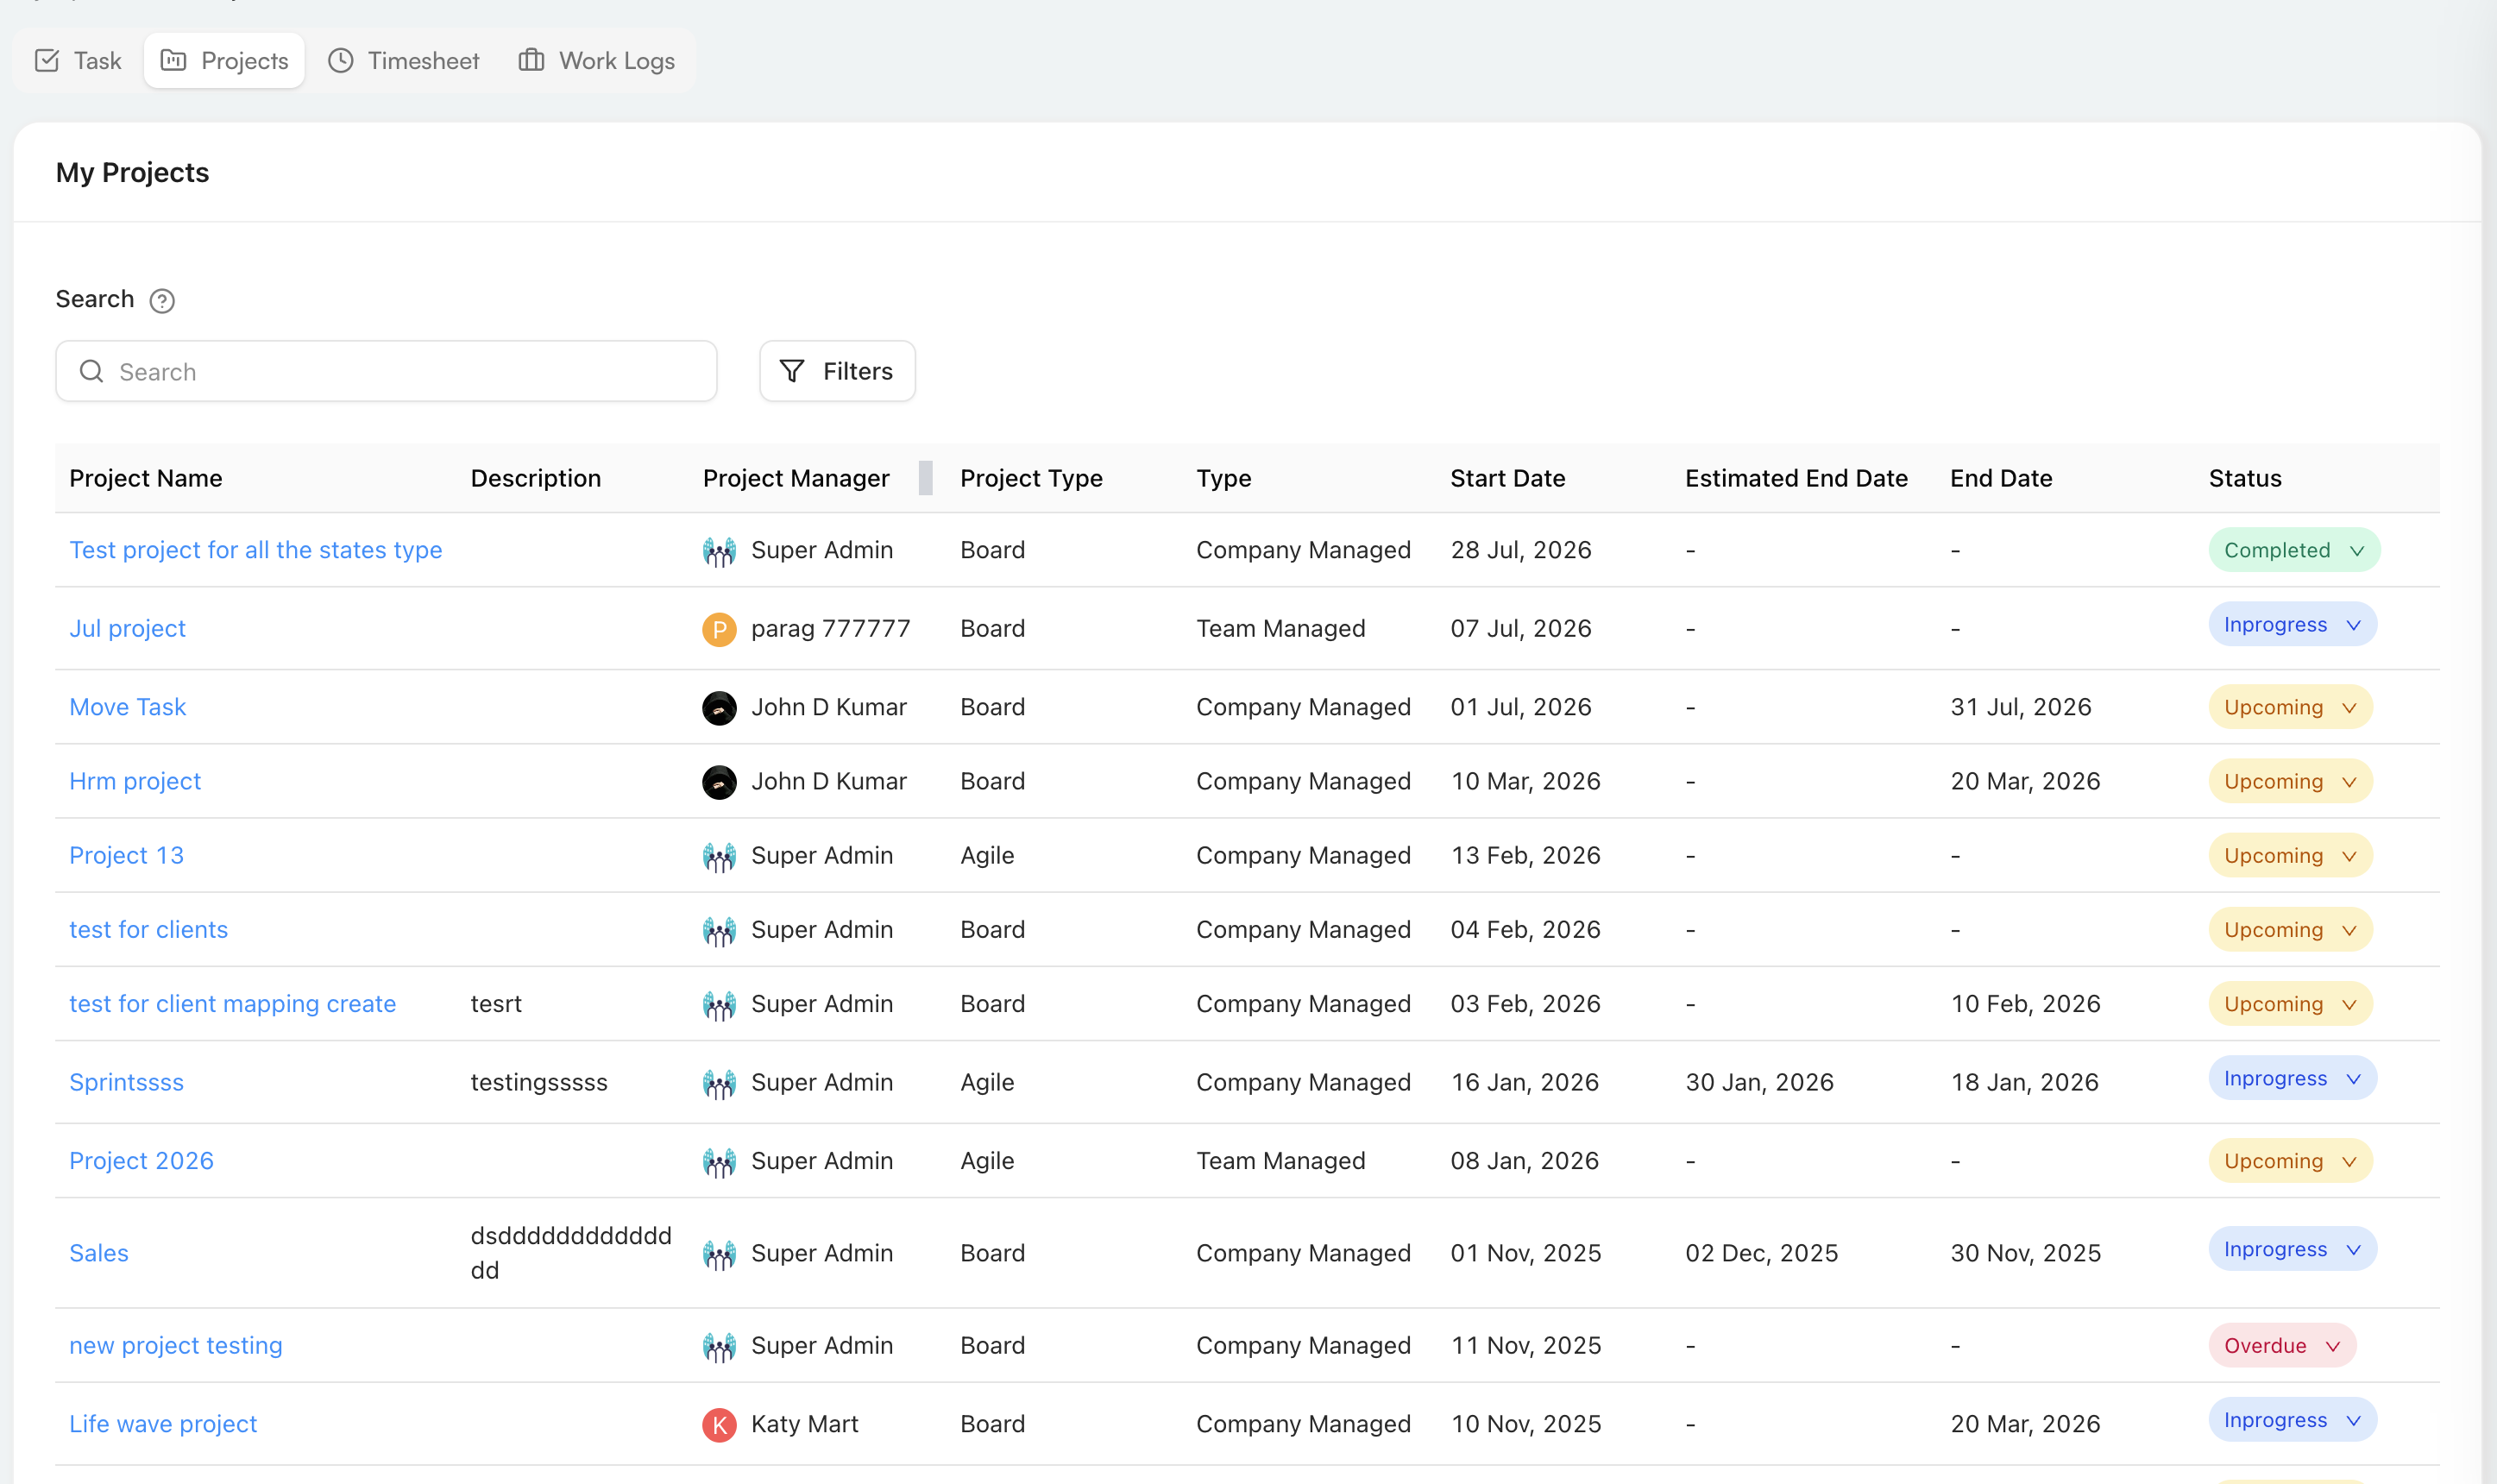
My Projects lists the projects to which you have access. Search or filter the list, then select a project name to open it. The table can show its description, project manager, project type, management type, start date, estimated end date, end date, and current status.
Project board
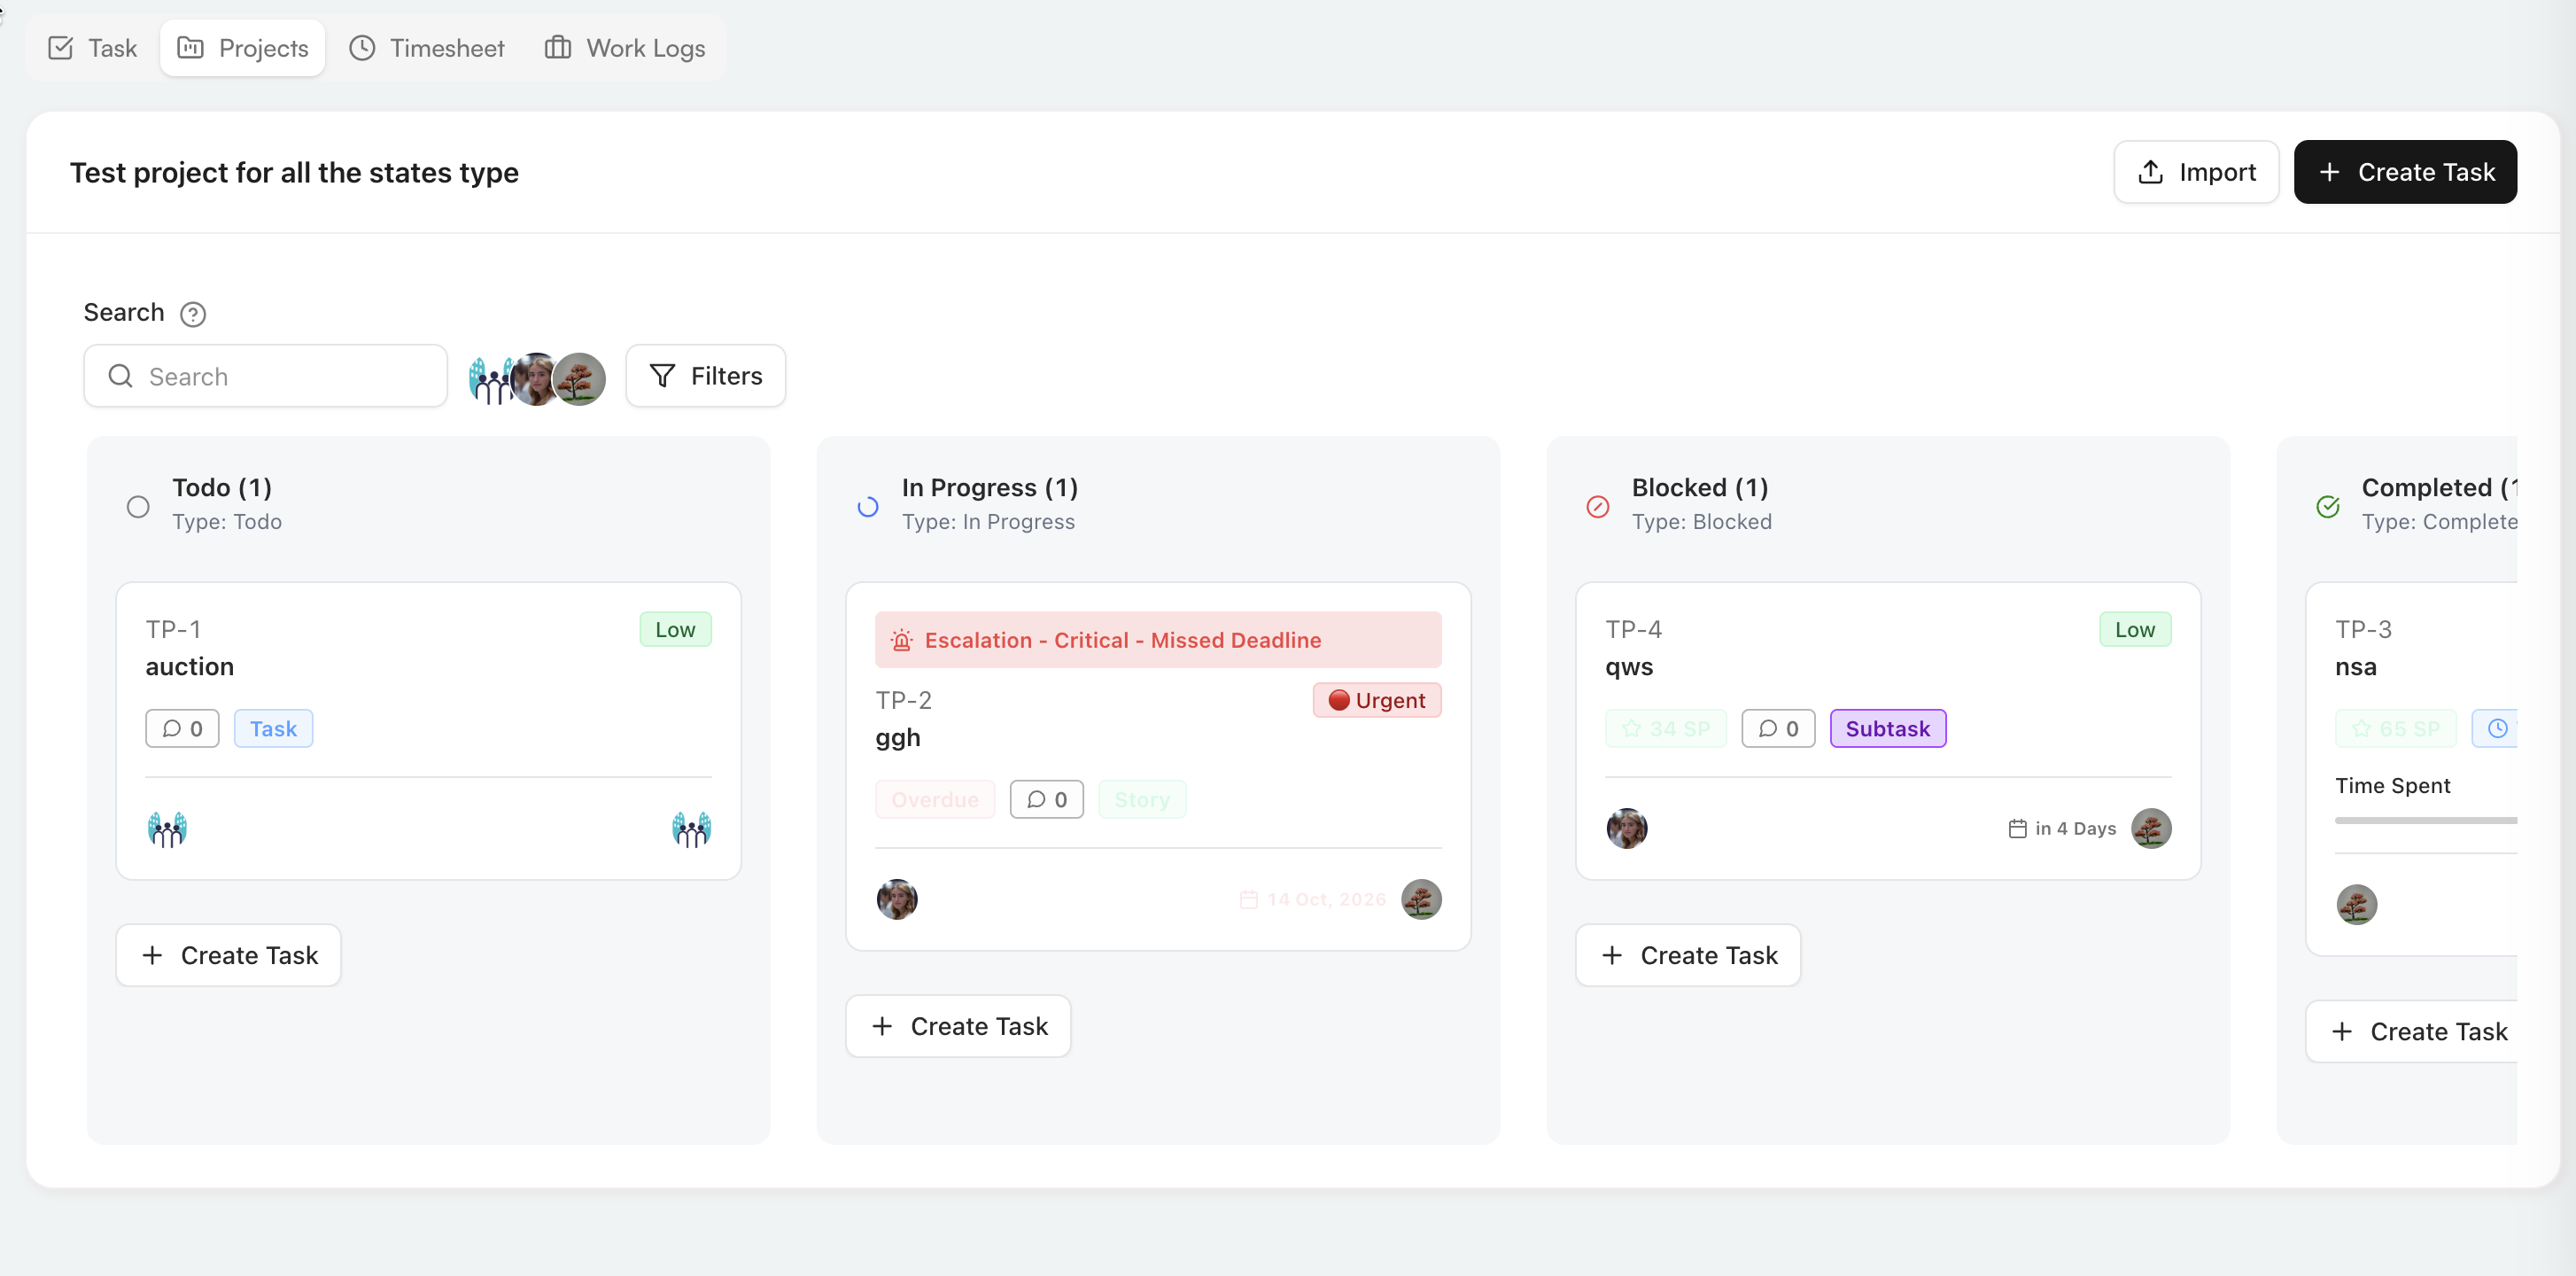
A project board shows only the tasks associated with that project. Use search, participant avatars, or Filters to narrow the board. Select Create Task within a workflow column to add a task there, use the main Create Task action to open the complete form, or select Import when you need to bring supported task data into the project.
An escalation banner on a card identifies its level and reason.
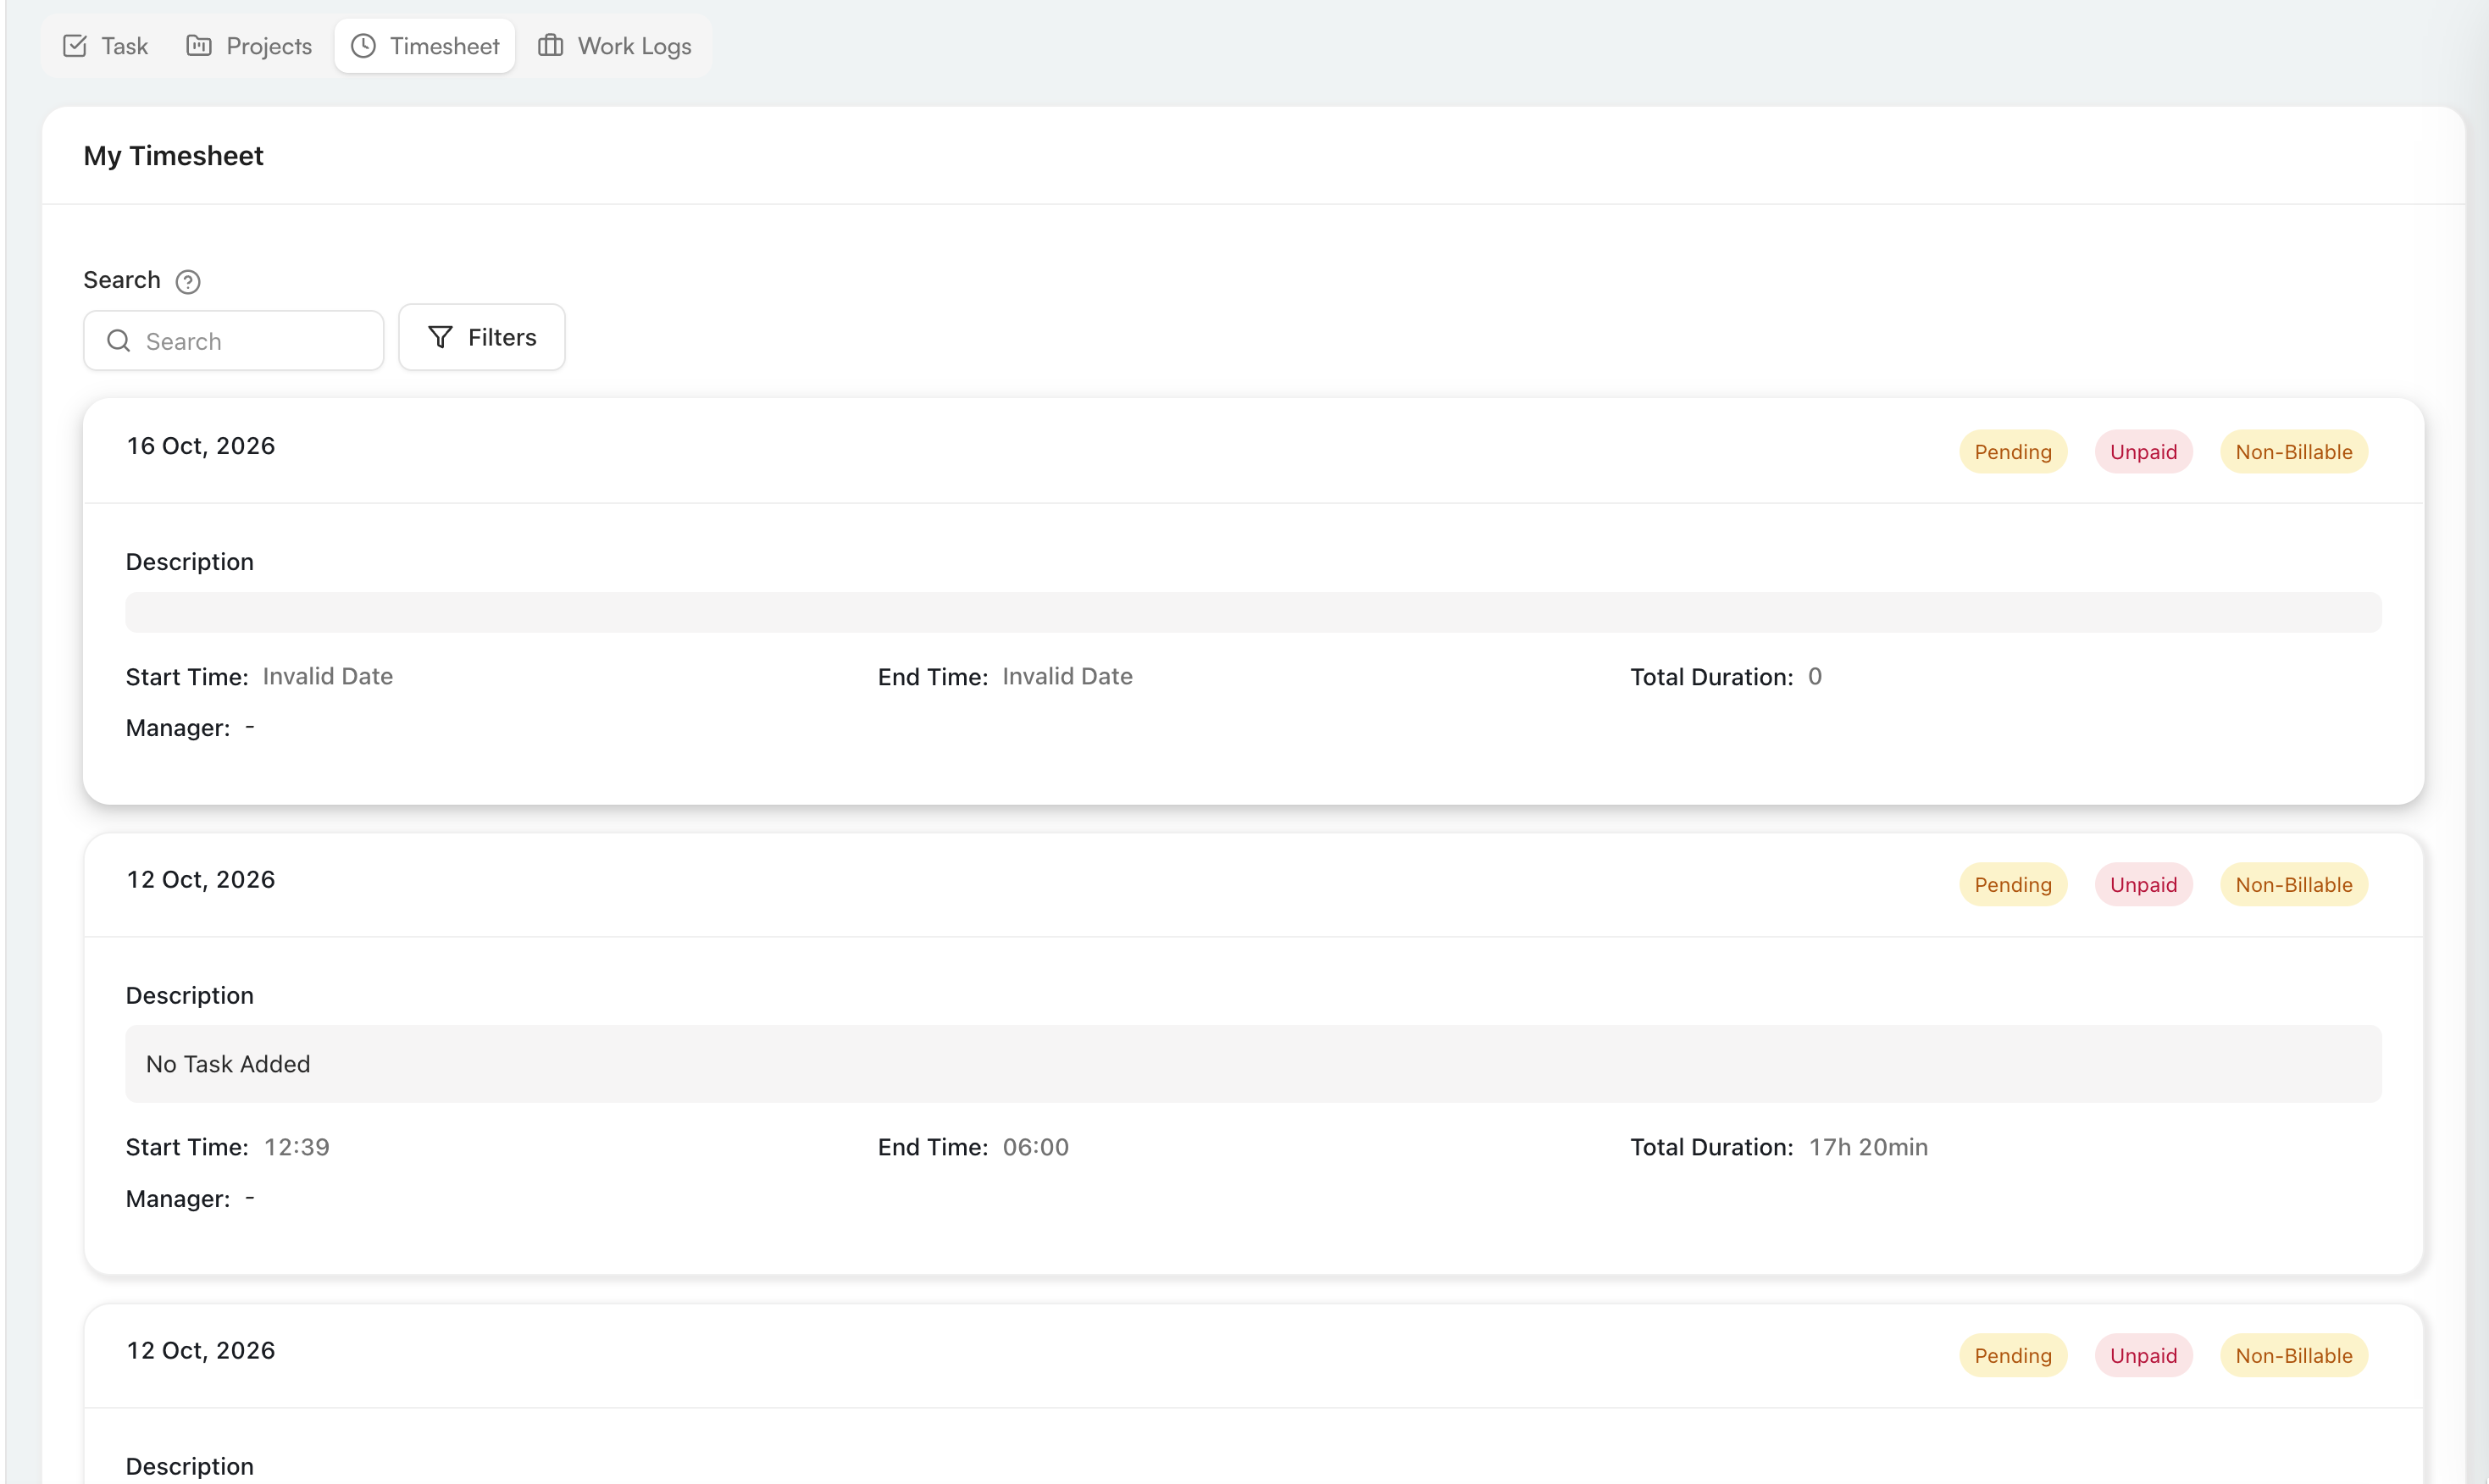
Timesheet
My Timesheet shows recorded work periods as date-based cards. Search or filter the entries. Each card can show:
- approval status, such as Pending;
- payment and billing classifications, such as Unpaid or Non-Billable;
- description;
- start and end times;
- total duration; and
- manager.
Work Logs
Work Logs displays screenshots captured by the desktop time tracker. Select an employee when permitted, use the date picker or arrows to move between dates, and review the check-in and check-out times.
If the tracker captured screenshots for the selected employee and date, those screenshots appear in the work-log area. If no screenshots were captured or no tracked activity exists for that selection, the page shows No data.